“MY-IMX6 Linux-3.14 编译手册”的版本间的差异
(→打包应用程序) |
|||
| 第1行: | 第1行: | ||
| − | = '''文档说明''' = | + | = '''文档说明(document instruction)''' = |
---- | ---- | ||
| − | == '''系统环境说明''' == | + | == '''系统环境说明(system environment instruction)''' == |
* 编译主机CPU架构:64位 <br> | * 编译主机CPU架构:64位 <br> | ||
| + | <span style="background:#CCCCCC">CUP architeture of host used for compilation:64bit</span><br> | ||
| + | |||
* 编译主机系统:Linux <br> | * 编译主机系统:Linux <br> | ||
| + | <span style="background:#CCCCCC">system of host:Linux</span><br> | ||
| + | |||
* Linux发行版:Ubuntu <br> | * Linux发行版:Ubuntu <br> | ||
| + | <span style="background:#CCCCCC">Linux release version:Ubuntu</span><br> | ||
| + | |||
* Ubuntu版本类型:服务器版 <br> | * Ubuntu版本类型:服务器版 <br> | ||
| + | <span style="background:#CCCCCC">Ubuntu version type:server version</span><br> | ||
| + | |||
* Ubuntu版本号:12.04.5 <br> | * Ubuntu版本号:12.04.5 <br> | ||
| + | <span style="background:#CCCCCC">Ubuntu version no.:12.04.5</span><br> | ||
| + | |||
* Ubuntu系统类型:x86-64 <br> | * Ubuntu系统类型:x86-64 <br> | ||
| + | <span style="background:#CCCCCC">Ubuntu system type:x86-64</span><br> | ||
<span style="color:red">注意:开发主机请使用ubuntu 12.04.5 x86-64(桌面版或服务器版均可),使用其他发行版的Linux或Ubuntu的其它版本可能会遇到的不必要的问题。 <br> | <span style="color:red">注意:开发主机请使用ubuntu 12.04.5 x86-64(桌面版或服务器版均可),使用其他发行版的Linux或Ubuntu的其它版本可能会遇到的不必要的问题。 <br> | ||
| + | <span style="background:#CCCCCC"><span style="color:red">Note: The development host should use ubuntu 12.04.5 x86-64(desktop and server version are available),Using other distribution of Linux and other versions of | ||
| + | Ubuntu may encounter unnecessary problems </span></span><br> | ||
| − | == '''操作说明 ''' == | + | |
| + | == '''操作说明 (operation instruction)''' == | ||
1)文档中以“$”开头的行,其后是Linux命令。 <br> | 1)文档中以“$”开头的行,其后是Linux命令。 <br> | ||
| + | <span style="background:#CCCCCC">The line in the document which begins with “$”,which is followed by the Linux command.。 </span><br> | ||
| + | |||
2)文档中所有的Linux命令建议手动输入到Linux主机执行(直接复制、粘贴到Linux主机上执行,可能会执行失败)。 <br> | 2)文档中所有的Linux命令建议手动输入到Linux主机执行(直接复制、粘贴到Linux主机上执行,可能会执行失败)。 <br> | ||
| + | <span style="background:#CCCCCC">All the Linux commands in the document are recommended to be entered into the host manually for execution.(Copying ,pasting to the host directly to execute may fail)。</span><br> | ||
| + | |||
3)文档中的Linux执行命令,如果空格后的下一个字符是“-”的(如:sudo apt-get –y install之类的),请手动输入到Linux主机执行(直接复制、粘贴到Linux主机上执行,通常会执行失败)。 <br> | 3)文档中的Linux执行命令,如果空格后的下一个字符是“-”的(如:sudo apt-get –y install之类的),请手动输入到Linux主机执行(直接复制、粘贴到Linux主机上执行,通常会执行失败)。 <br> | ||
| + | <span style="background:#CCCCCC">In all the Linux execution commands of the document,if the next character after the space is "-",(example:sudo apt-get –y install),please enter into Linux host to execute manually.(Copying ,pasting to the host directly to execute may fail ).)。</span><br> | ||
| + | |||
4)文档中所有一行没写完的Linux命令请手动输入到Linux主机执行,(因为复制、粘贴命令不能包含类似“换行符”之类的特殊字符)。 <br> | 4)文档中所有一行没写完的Linux命令请手动输入到Linux主机执行,(因为复制、粘贴命令不能包含类似“换行符”之类的特殊字符)。 <br> | ||
| + | <span style="background:#CCCCCC">any line of Linux commands whichi is not finished is recommended to be entered into the host for execution. (Because copy or paste commands cannot contain special character such as "line breaks")。)。</span><br> | ||
| + | |||
5)按文档输入并执行Linux命令时注意观察命令的执行结果与文档图片中的是否一致,以确认命令是否输入有误及是否执行失败。 <br> | 5)按文档输入并执行Linux命令时注意观察命令的执行结果与文档图片中的是否一致,以确认命令是否输入有误及是否执行失败。 <br> | ||
| + | <span style="background:#CCCCCC">Note whether the execution result is consistent with the document image when you enter and execute the command. check the command was entered incorrectly or failed to execute.。</span><br> | ||
| + | |||
6)第一遍编译请严格按照文档进行,否则可能出现莫名其妙的错误。<br> | 6)第一遍编译请严格按照文档进行,否则可能出现莫名其妙的错误。<br> | ||
| − | == '''截图说明''' == | + | <span style="background:#CCCCCC">Please follow the document strictly to compile for the first time.Otherwise ,there may be unexpected error。</span><br> |
| + | |||
| + | |||
| + | == '''截图说明(screenshots instruction)''' == | ||
为使视图看起来简洁整齐,截图中的命令提示符统一使用myzr$。<br> | 为使视图看起来简洁整齐,截图中的命令提示符统一使用myzr$。<br> | ||
| − | == '''图片中的Linux命令''' == | + | <span style="background:#CCCCCC">To make the view look neat and tidy , the command prompt in the screenshot should use myzr$ uniformly。</span><br> |
| + | |||
| + | |||
| + | == '''图片中的Linux命令(Linux command in the image)''' == | ||
在文档的图片中观察“myzr$”开头的行可以直观的看到输入的Linux命令。<br> | 在文档的图片中观察“myzr$”开头的行可以直观的看到输入的Linux命令。<br> | ||
| − | == <span style="color:red">'''重要信息说明'''</span> == | + | <span style="background:#CCCCCC">In the image of the document, you can see the input Linux command visually from the lines that start with “myzr$”。</span><br> |
| + | |||
| + | |||
| + | == <span style="color:red">'''重要信息说明(important information instruction)'''</span> == | ||
<span style="color:red">为避免各位客户在搭建开发环境及编译过程中遇到不必要的问题浪费时间和精力,推荐使用明远智睿发布的“vb43-u12045-serv-amd64”虚拟机系统。<br></span> | <span style="color:red">为避免各位客户在搭建开发环境及编译过程中遇到不必要的问题浪费时间和精力,推荐使用明远智睿发布的“vb43-u12045-serv-amd64”虚拟机系统。<br></span> | ||
| − | '''具体参见 [[MYZR虚拟机系统指导]]''' | + | <span style="background:#CCCCCC">To avoid our customers wasting time and energy when they encounter unnecessary problems in building development environment and compiling process,it is recommended to use “vb43-u12045-serv-amd64” virtual machine system released by MYZR。</span><br> |
| + | |||
| + | |||
| + | '''具体参见 [[MYZR虚拟机系统指导]](details refered to [[MYZR virtual machine system guidance]])''' | ||
| − | = '''准备源码及相关文件''' = | + | = '''准备源码及相关文件(prepare source code and relevant file)''' = |
---- | ---- | ||
| − | == '''源码文件''' == | + | == '''源码文件(source code)''' == |
评估板对应的Linux版本及对应的源码文件见下表:<br> | 评估板对应的Linux版本及对应的源码文件见下表:<br> | ||
| + | <span style="background:#CCCCCC">The corresponding Linux version of the evaluation board and the corresponding source code files are shown in the table below:</span><br> | ||
| + | |||
{| class="wikitable" | {| class="wikitable" | ||
|- | |- | ||
| − | !评估板型号 || u-boot源码文件 || linux源码文件 | + | !评估板型号<br>(evaluation board model) || u-boot源码文件<br>(u-boot source code) || linux源码文件<br>(linux source code) |
|- | |- | ||
|MY-IMX6-EK200 || rowspan=4|u-boot-2015.04.tar.xz || rowspan=4|linux-3.14.52.tar.xz | |MY-IMX6-EK200 || rowspan=4|u-boot-2015.04.tar.xz || rowspan=4|linux-3.14.52.tar.xz | ||
| 第43行: | 第81行: | ||
|} | |} | ||
| − | == '''交叉编译工具文件''' == | + | |
| + | == '''交叉编译工具文件(cross compiler tool file)''' == | ||
Linux程序交叉编译工具:gcc-linaro-arm-linux-gnueabihf-4.9-2014.09_linux.tar.xz<br> | Linux程序交叉编译工具:gcc-linaro-arm-linux-gnueabihf-4.9-2014.09_linux.tar.xz<br> | ||
| + | <span style="background:#CCCCCC">Linux program cross compiler tool:gcc-linaro-arm-linux-gnueabihf-4.9-2014.09_linux.tar.xz</span><br> | ||
| + | |||
Linux交叉编译工具配置文件:gcc-linaro-arm-linux-gnueabihf-492-env<br> | Linux交叉编译工具配置文件:gcc-linaro-arm-linux-gnueabihf-492-env<br> | ||
| + | <span style="background:#CCCCCC">Linux cross compiler tool configuration file:gcc-linaro-arm-linux-gnueabihf-492-env</span><br> | ||
| + | |||
QT5程序交叉编译工具:fsl-imx-x11-glibc-x86_64-meta-toolchain-qt5-cortexa9hf-vfp-neon-toolchain-3.14.52-1.1.0.sh<br> | QT5程序交叉编译工具:fsl-imx-x11-glibc-x86_64-meta-toolchain-qt5-cortexa9hf-vfp-neon-toolchain-3.14.52-1.1.0.sh<br> | ||
| + | <span style="background:#CCCCCC">QT5 program compiler tool:fsl-imx-x11-glibc-x86_64-meta-toolchain-qt5-cortexa9hf-vfp-neon-toolchain-3.14.52-1.1.0.sh</span><br> | ||
| − | == '''创建工作目录''' == | + | |
| + | == '''创建工作目录(creat working directory)''' == | ||
1)源码目录<br> | 1)源码目录<br> | ||
| + | <span style="background:#CCCCCC">source code directory</span><br> | ||
$ mkdir ~/my-imx6/02_source –p <br> | $ mkdir ~/my-imx6/02_source –p <br> | ||
[[文件:myimx6linux3.14_build_2.3.0.1.png]]<br> | [[文件:myimx6linux3.14_build_2.3.0.1.png]]<br> | ||
| + | |||
2)工具目录<br> | 2)工具目录<br> | ||
| + | <span style="background:#CCCCCC">tool directory</span><br> | ||
$ mkdir ~/my-imx6/03_tools –p<br> | $ mkdir ~/my-imx6/03_tools –p<br> | ||
[[文件:myimx6linux3.14_build_2.3.0.2.png]]<br> | [[文件:myimx6linux3.14_build_2.3.0.2.png]]<br> | ||
| + | |||
3)镜像目录<br> | 3)镜像目录<br> | ||
| + | <span style="background:#CCCCCC">image directory</span><br> | ||
$ mkdir ~/my-imx6/04_image –p<br> | $ mkdir ~/my-imx6/04_image –p<br> | ||
[[文件:myimx6linux3.14_build_2.3.0.3.png]]<br> | [[文件:myimx6linux3.14_build_2.3.0.3.png]]<br> | ||
$ mkdir ~/my-imx6/04_image/image-linux-31452 –p<br> | $ mkdir ~/my-imx6/04_image/image-linux-31452 –p<br> | ||
[[文件:myimx6linux3.14_build_2.3.0.4.png]]<br> | [[文件:myimx6linux3.14_build_2.3.0.4.png]]<br> | ||
| + | |||
4)应用程序目录<br> | 4)应用程序目录<br> | ||
| + | <span style="background:#CCCCCC">application diretory</span><br> | ||
$ mkdir ~/my-demo<br> | $ mkdir ~/my-demo<br> | ||
[[文件:myimx6linux3.14_build_2.3.0.5.png]]<br> | [[文件:myimx6linux3.14_build_2.3.0.5.png]]<br> | ||
| − | = '''安装交叉编译工具链''' = | + | |
| + | = '''安装交叉编译工具链(install cross compiler tool chain)''' = | ||
---- | ---- | ||
| − | == '''安装Linux交叉编译工具链''' == | + | == '''安装Linux交叉编译工具链(install Linux cross compiler tool chain)''' == |
1)进入交叉编译工具链目录<br> | 1)进入交叉编译工具链目录<br> | ||
| + | <span style="background:#CCCCCC">enter cross compiler tool chain diretory</span><br> | ||
$ cd ~/my-imx6/03_tools/<br> | $ cd ~/my-imx6/03_tools/<br> | ||
| + | |||
2)复制Linux交叉编译工具到目录<br> | 2)复制Linux交叉编译工具到目录<br> | ||
| + | <span style="background:#CCCCCC">copy Linux cross compiler tool to directory</span><br> | ||
将gcc-linaro-arm-linux-gnueabihf-4.9-2014.09_linux.tar.xz复制到“~/my-imx6/03_tools”,这一步自己采取相应的方式完成。<br> | 将gcc-linaro-arm-linux-gnueabihf-4.9-2014.09_linux.tar.xz复制到“~/my-imx6/03_tools”,这一步自己采取相应的方式完成。<br> | ||
| + | <span style="background:#CCCCCC"></span><br> | ||
| + | |||
3)解压Linux交叉编译工具<br> | 3)解压Linux交叉编译工具<br> | ||
| + | <span style="background:#CCCCCC">copy gcc-linaro-arm-linux-gnueabihf-4.9-2014.09_linux.tar.xz to“~/my-imx6/03_tools”,complete this step by yourself in a proper way。</span><br> | ||
$ tar xf gcc-linaro-arm-linux-gnueabihf-4.9-2014.09_linux.tar.xz<br> | $ tar xf gcc-linaro-arm-linux-gnueabihf-4.9-2014.09_linux.tar.xz<br> | ||
[[文件:myimx6linux3.14_build_4.1.0.1.png]]<br> | [[文件:myimx6linux3.14_build_4.1.0.1.png]]<br> | ||
| + | |||
4)复制交叉编译工具配置文件<br> | 4)复制交叉编译工具配置文件<br> | ||
| + | <span style="background:#CCCCCC">copy cross compiler tool configuration file</span><br> | ||
将gcc-linaro-arm-linux-gnueabihf-492-env复制到“~/my-imx6/03_tools”,这一步自己采取相应的方式完成。<br> | 将gcc-linaro-arm-linux-gnueabihf-492-env复制到“~/my-imx6/03_tools”,这一步自己采取相应的方式完成。<br> | ||
| + | <span style="background:#CCCCCC">copy gcc-linaro-arm-linux-gnueabihf-492-env to“~/my-imx6/03_tools”,complete this step by yourself in a proper way。</span><br> | ||
| + | |||
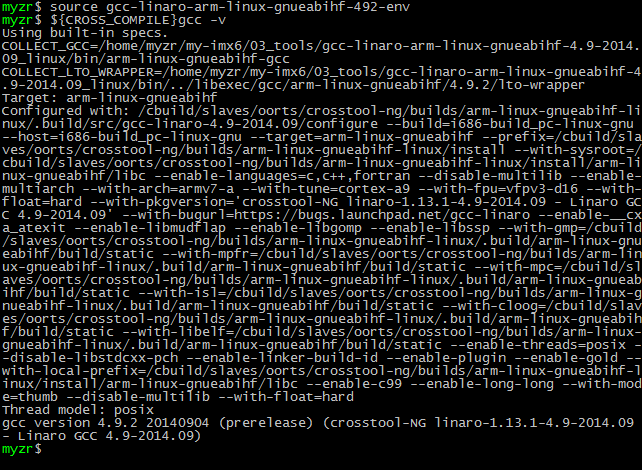
5)检查安装<br> | 5)检查安装<br> | ||
| + | <span style="background:#CCCCCC">check installation</span><br> | ||
$ source gcc-linaro-arm-linux-gnueabihf-492-env<br> | $ source gcc-linaro-arm-linux-gnueabihf-492-env<br> | ||
$ ${CROSS_COMPILE}gcc –v<br> | $ ${CROSS_COMPILE}gcc –v<br> | ||
[[文件:myimx6linux3.14_build_4.1.0.2.png]]<br> | [[文件:myimx6linux3.14_build_4.1.0.2.png]]<br> | ||
| − | == '''安装QT5交叉编译工具''' == | + | |
| + | |||
| + | == '''安装QT5交叉编译工具(install QT5 cross compiler tool)''' == | ||
1)进入交叉编译工具链目录<br> | 1)进入交叉编译工具链目录<br> | ||
| + | <span style="background:#CCCCCC">enter cross compiler tool chain directory</span><br> | ||
$ cd ~/my-imx6/03_tools/<br> | $ cd ~/my-imx6/03_tools/<br> | ||
[[文件:myimx6linux3.14_build_4.2.0.1.png]]<br> | [[文件:myimx6linux3.14_build_4.2.0.1.png]]<br> | ||
| + | |||
2)执行安装命令<br> | 2)执行安装命令<br> | ||
| + | <span style="background:#CCCCCC">execute installation command</span><br> | ||
$ sh fsl-imx-x11-glibc-x86_64-meta-toolchain-qt5-cortexa9hf-vfp-neon-toolchain-3.14.52-1.1.0.sh<br> | $ sh fsl-imx-x11-glibc-x86_64-meta-toolchain-qt5-cortexa9hf-vfp-neon-toolchain-3.14.52-1.1.0.sh<br> | ||
| + | |||
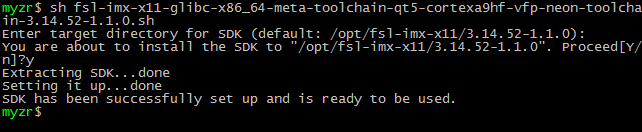
3)选择安装路径<br> | 3)选择安装路径<br> | ||
| + | <span style="background:#CCCCCC">choose installation path</span><br> | ||
执行安装命令后会出现如下提示信息:<br> | 执行安装命令后会出现如下提示信息:<br> | ||
| + | <span style="background:#CCCCCC">after execution of installation command,there will be a following prompt message:</span><br> | ||
Enter target directory for SDK (default: /opt/fsl-imx-x11/3.14.52-1.1.0):<br> | Enter target directory for SDK (default: /opt/fsl-imx-x11/3.14.52-1.1.0):<br> | ||
这时按“回车(Enter)”键,我们保持默认的安装路径。<br> | 这时按“回车(Enter)”键,我们保持默认的安装路径。<br> | ||
| + | <span style="background:#CCCCCC">then press“Enter”key,let's keep defauted installation path。</span><br> | ||
| + | |||
4)确认安装路径<br> | 4)确认安装路径<br> | ||
| + | <span style="background:#CCCCCC">confirm installation path</span><br> | ||
之后,会提示如下信息:<br> | 之后,会提示如下信息:<br> | ||
| + | <span style="background:#CCCCCC">afterwards,there will be a following prompt message:</span><br> | ||
You are about to install the SDK to "/opt/fsl-imx-x11/3.14.52-1.1.0". Proceed[Y/n]? | You are about to install the SDK to "/opt/fsl-imx-x11/3.14.52-1.1.0". Proceed[Y/n]? | ||
这时输入“Y”并按“回车(Enter)”键表示确认。<br> | 这时输入“Y”并按“回车(Enter)”键表示确认。<br> | ||
| + | <span style="background:#CCCCCC">then enter“Y”and press“Enter”key for confirmation。</span><br> | ||
[[文件:myimx6linux3.14_build_4.2.0.2.png]]<br> | [[文件:myimx6linux3.14_build_4.2.0.2.png]]<br> | ||
| + | |||
5)等待安装完成<br> | 5)等待安装完成<br> | ||
| + | <span style="background:#CCCCCC">wait untill installation is completed</span><br> | ||
提示:安装过程大概需要几分钟的时间。 | 提示:安装过程大概需要几分钟的时间。 | ||
| + | <span style="background:#CCCCCC">tips:installation will take a few minutes。</span><br> | ||
| + | |||
6) 检查安装<br> | 6) 检查安装<br> | ||
| + | <span style="background:#CCCCCC">check installation</span><br> | ||
查看交叉编译工具链的版本信息以验证交叉编译工具链安装正常。<br> | 查看交叉编译工具链的版本信息以验证交叉编译工具链安装正常。<br> | ||
| + | <span style="background:#CCCCCC">check the version information of cross compiler tool chain to verify the normality of installation</span><br> | ||
$ source /opt/fsl-imx-x11/3.14.52-1.1.0/environment-setup-cortexa9hf-vfp-neon-poky-linux-gnueabi<br> | $ source /opt/fsl-imx-x11/3.14.52-1.1.0/environment-setup-cortexa9hf-vfp-neon-poky-linux-gnueabi<br> | ||
$ qmake -v<br> | $ qmake -v<br> | ||
执行命令后会也出现类似如下的信息:<br> | 执行命令后会也出现类似如下的信息:<br> | ||
| + | <span style="background:#CCCCCC">after execution of command,there will be following message:</span><br> | ||
[[文件:myimx6linux3.14_build_4.2.0.3.png]]<br> | [[文件:myimx6linux3.14_build_4.2.0.3.png]]<br> | ||
| − | = '''U-Boot编译''' = | + | |
| + | = '''U-Boot编译(U-Boot compilation)''' = | ||
---- | ---- | ||
| − | == '''准备编译''' == | + | == '''准备编译(prepare compilation)''' == |
| − | === 复制源码包到开发主机中 === | + | |
| + | === 复制源码包到开发主机中(copy source code package to development host) === | ||
将下载的“u-boot源码”复制到Linux开发主机的“~/my-imx6/02_source”。<br> | 将下载的“u-boot源码”复制到Linux开发主机的“~/my-imx6/02_source”。<br> | ||
| + | <span style="background:#CCCCCC">copy“u-boot source code”downloaded to “~/my-imx6/02_source”of Linux development host。</span><br> | ||
这一步自己采取相应的方式完成。<br> | 这一步自己采取相应的方式完成。<br> | ||
| − | === 解压u-boot源码包 === | + | <span style="background:#CCCCCC">complete this step by yourself in a proper way。</span><br> |
| + | |||
| + | |||
| + | === 解压u-boot源码包(decompress u-boot source code package) === | ||
$ cd ~/my-imx6/02_source/<br> | $ cd ~/my-imx6/02_source/<br> | ||
$ tar xf u-boot-2015.04.tar.xz<br> | $ tar xf u-boot-2015.04.tar.xz<br> | ||
[[文件:myimx6linux3.14_build_5.1.2.1.png]]<br> | [[文件:myimx6linux3.14_build_5.1.2.1.png]]<br> | ||
| − | == '''编译''' == | + | |
| − | === 使编译配置文件生效 === | + | |
| + | == '''编译(compilation)''' == | ||
| + | === 使编译配置文件生效(validate compiler configuration file) === | ||
$ source ~/my-imx6/03_tools/gcc-linaro-arm-linux-gnueabihf-492-env<br> | $ source ~/my-imx6/03_tools/gcc-linaro-arm-linux-gnueabihf-492-env<br> | ||
[[文件:myimx6linux3.14_build_5.2.1.1.png]]<br> | [[文件:myimx6linux3.14_build_5.2.1.1.png]]<br> | ||
| − | === 进入u-boot源码目录 === | + | |
| + | === 进入u-boot源码目录(enter u-boot source code directory) === | ||
$ cd ~/my-imx6/02_source/u-boot-2015.04<br> | $ cd ~/my-imx6/02_source/u-boot-2015.04<br> | ||
[[文件:myimx6linux3.14_build_5.2.2.1.png]]<br> | [[文件:myimx6linux3.14_build_5.2.2.1.png]]<br> | ||
| − | === 清除u-boot临时文件 === | + | |
| + | |||
| + | === 清除u-boot临时文件 (remove u-boot temporary files)=== | ||
$ make distclean <br> | $ make distclean <br> | ||
[[文件:myimx6linux3.14_build_5.2.3.1.png]]<br> | [[文件:myimx6linux3.14_build_5.2.3.1.png]]<br> | ||
| − | === 配置u-boot === | + | |
| + | |||
| + | === 配置u-boot(configure u-boot) === | ||
* 评估板及对应的 u-boot 编译配置:<br> | * 评估板及对应的 u-boot 编译配置:<br> | ||
| + | <span style="background:#CCCCCC">configuration of development and its corresponding compiler:</span><br> | ||
| + | |||
{| class="wikitable" | {| class="wikitable" | ||
|- | |- | ||
| − | !评估板主型号 || CPU类型-内存容量 || 处理器架构 || 对应的u-boot配置 | + | !评估板主型号<br>(development board main model) || CPU类型-内存容量<br>(CPU type-memory capacity ) || 处理器架构<br>(architeture of processor) || 对应的u-boot配置<br>(corresponding u-boot configuration) |
|- | |- | ||
|rowspan=7|MY-IMX6-EK200 | |rowspan=7|MY-IMX6-EK200 | ||
| 第173行: | 第272行: | ||
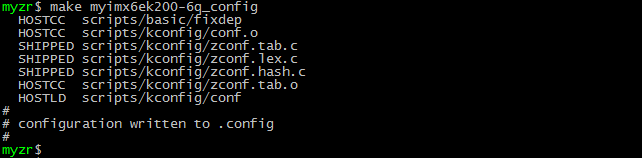
*MYIMX6EK200-6Q-1G配置示例:<br> | *MYIMX6EK200-6Q-1G配置示例:<br> | ||
| + | <span style="background:#CCCCCC">MYIMX6EK200-6Q-1G configuration example:</span><br> | ||
$ make myimx6ek200-6q_config <br> | $ make myimx6ek200-6q_config <br> | ||
[[文件:myimx6linux3.14_build_5.2.4.1.png]]<br> | [[文件:myimx6linux3.14_build_5.2.4.1.png]]<br> | ||
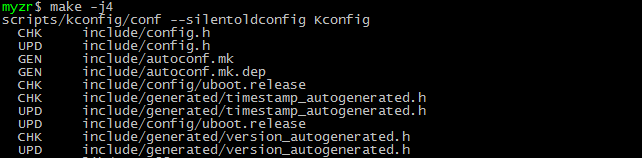
| − | === 执行编译 === | + | === 执行编译(execute compilation) === |
$ make <br> | $ make <br> | ||
提示:这里为了提高编译速度,在make后面加了“-j4”。这里编译的Linux主机是双核4线程的,所以“-j”后面用了4,也就是采用4线程编译。“-j”后面的数字可以根据系统资源分配,但是不应该超过编译主机最大支持的线程数。<br> | 提示:这里为了提高编译速度,在make后面加了“-j4”。这里编译的Linux主机是双核4线程的,所以“-j”后面用了4,也就是采用4线程编译。“-j”后面的数字可以根据系统资源分配,但是不应该超过编译主机最大支持的线程数。<br> | ||
| + | <span style="background:#CCCCCC">Tips:To speed up the compilation,add "-j4" after make.The Linux host used to compile is dual-core ,4 threads .So "-j" is followed by 4, which takes 4 threads to compile. The number behind "-j" is allocated based on system resources,but It should not exceed the maximum threads the host support.</span><br> | ||
[[文件:myimx6linux3.14_build_5.2.5.1.png]]<br> | [[文件:myimx6linux3.14_build_5.2.5.1.png]]<br> | ||
| + | |||
* 编译完成<br> | * 编译完成<br> | ||
| + | <span style="background:#CCCCCC">complete compilation</span><br> | ||
提示:u-boot编译过程大概需要一、两分钟时间。<br> | 提示:u-boot编译过程大概需要一、两分钟时间。<br> | ||
| + | <span style="background:#CCCCCC">Tips: u-boot compiling process may take one or two minutes。</span><br> | ||
[[文件:myimx6linux3.14_build_5.2.5.2.png]]<br> | [[文件:myimx6linux3.14_build_5.2.5.2.png]]<br> | ||
| − | == '''目标文件''' == | + | |
| + | |||
| + | == '''目标文件(target file)''' == | ||
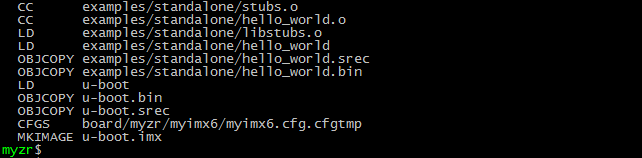
* 编译文件<br> | * 编译文件<br> | ||
| + | <span style="background:#CCCCCC">compile file</span><br> | ||
编译完成后通过ls命令即可看到编译得到的文件u-boot.imx<br> | 编译完成后通过ls命令即可看到编译得到的文件u-boot.imx<br> | ||
| + | <span style="background:#CCCCCC">you can get the compiled file u-boot .imx with ls command after compilation.</span><br> | ||
$ ls <br> | $ ls <br> | ||
[[文件:myimx6linux3.14_build_5.3.0.1.png]]<br> | [[文件:myimx6linux3.14_build_5.3.0.1.png]]<br> | ||
| + | |||
* 目标文件<br> | * 目标文件<br> | ||
| + | <span style="background:#CCCCCC">target file</span><br> | ||
MY-IMX6系列评估板的u-boot配置对应的目标文件名见下表:<br> | MY-IMX6系列评估板的u-boot配置对应的目标文件名见下表:<br> | ||
| + | <span style="background:#CCCCCC">The corresponding target file name for u-boot configuration of MY-IMX6 series evaluation board is shown in the table below:</span><br> | ||
{| class="wikitable" | {| class="wikitable" | ||
|- | |- | ||
| − | ! | + | !u-boot配置<br>(u-boot configuration) || 目标文件<br>(target file) |
|- | |- | ||
|myimx6ek200-6qp_config || uboot-myimx6ek200-6qp.imx | |myimx6ek200-6qp_config || uboot-myimx6ek200-6qp.imx | ||
| 第238行: | 第349行: | ||
我们需要将编译得到的u-boot.imx复制为我们的目标文件名。<br> | 我们需要将编译得到的u-boot.imx复制为我们的目标文件名。<br> | ||
| + | <span style="background:#CCCCCC">We need to copy the compilied file u-boot.imx as our target file name.:</span><br> | ||
这里以MY-IMX6-EK200-6Q为例(把配置myimx6ek200-6q_config编译生成的u-boot.imx复制为目标文件):<br> | 这里以MY-IMX6-EK200-6Q为例(把配置myimx6ek200-6q_config编译生成的u-boot.imx复制为目标文件):<br> | ||
| + | <span style="background:#CCCCCC">Copy the generated file u-boot.imx from the compilation of myimx6ek200-6q_config as target file.):</span><br> | ||
$ cp u-boot.imx ~/my-imx6/04_image/image-linux-31452/uboot-myimx6ek200-6q.imx<br> | $ cp u-boot.imx ~/my-imx6/04_image/image-linux-31452/uboot-myimx6ek200-6q.imx<br> | ||
[[文件:myimx6linux3.14_build_5.3.0.2.png]]<br> | [[文件:myimx6linux3.14_build_5.3.0.2.png]]<br> | ||
| − | = '''编译内核''' = | + | |
| + | = '''编译内核(compile kernel)''' = | ||
---- | ---- | ||
| − | == '''准备编译''' == | + | == '''准备编译(prepare compilation)''' == |
| − | === 复制源码包到开发主机中 === | + | === 复制源码包到开发主机中(copy source code package to development host) === |
将下载的“linux源码”复制到Linux开发主机的“~/my-imx6/02_source”。<br> | 将下载的“linux源码”复制到Linux开发主机的“~/my-imx6/02_source”。<br> | ||
| + | <span style="background:#CCCCCC">copy “linux source code”downloaded to “~/my-imx6/02_source”of Linux development host。</span><br> | ||
这一步自己采取相应的方式完成。<br> | 这一步自己采取相应的方式完成。<br> | ||
| − | === 解压linux源码包 === | + | <span style="background:#CCCCCC">complete this step by yourself in a proper way。</span><br> |
| + | |||
| + | |||
| + | === 解压linux源码包(decompress linux source code package) === | ||
$ cd ~/my-imx6/02_source/<br> | $ cd ~/my-imx6/02_source/<br> | ||
$ tar xf linux-3.14.52.tar.xz<br> | $ tar xf linux-3.14.52.tar.xz<br> | ||
[[文件:myimx6linux3.14_build_6.1.2.1.png]]<br> | [[文件:myimx6linux3.14_build_6.1.2.1.png]]<br> | ||
| − | == '''内核编译配置''' == | + | |
| − | === 使编译配置文件生效 === | + | |
| + | == '''内核编译配置(kernel compilation configuration)''' == | ||
| + | === 使编译配置文件生效(validate compilfer configuration file) === | ||
$ source ~/my-imx6/03_tools/gcc-linaro-arm-linux-gnueabihf-492-env<br> | $ source ~/my-imx6/03_tools/gcc-linaro-arm-linux-gnueabihf-492-env<br> | ||
[[文件:myimx6linux3.14_build_6.2.1.1.png]]<br> | [[文件:myimx6linux3.14_build_6.2.1.1.png]]<br> | ||
| − | === 清除内核临时文件 === | + | |
| + | === 清除内核临时文件(remove kernel temporary file) === | ||
* 进入linux源码目录<br> | * 进入linux源码目录<br> | ||
| + | <span style="background:#CCCCCC">enter linux source code directory</span><br> | ||
$ cd ~/my-imx6/02_source/linux-3.14.52<br> | $ cd ~/my-imx6/02_source/linux-3.14.52<br> | ||
[[文件:myimx6linux3.14_build_6.2.2.1.png]]<br> | [[文件:myimx6linux3.14_build_6.2.2.1.png]]<br> | ||
| + | |||
* 清除临时文件<br> | * 清除临时文件<br> | ||
| + | <span style="background:#CCCCCC">remove temporary file</span><br> | ||
$ make distclean <br> | $ make distclean <br> | ||
[[文件:myimx6linux3.14_build_6.2.2.2.png]]<br> | [[文件:myimx6linux3.14_build_6.2.2.2.png]]<br> | ||
| − | === 内核配置 === | + | |
| + | |||
| + | === 内核配置(kernel configuration) === | ||
*内核配置文件 | *内核配置文件 | ||
| + | <span style="background:#CCCCCC">kernel configuration file</span><br> | ||
{| class="wikitable" | {| class="wikitable" | ||
|- | |- | ||
| − | !评估板型号 || 配置文件 | + | !评估板型号<br>(evaluation board model) || 配置文件<br>(configuration file) |
|- | |- | ||
|MY-IMX6-EK200 || rowspan=3|myimx6_defconfig | |MY-IMX6-EK200 || rowspan=3|myimx6_defconfig | ||
| 第280行: | 第407行: | ||
$ make myimx6_defconfig <br> | $ make myimx6_defconfig <br> | ||
如果是编译 MY-IMX6-EK140 的内核,请使用 $ make myimx6ul_defconfig <br> | 如果是编译 MY-IMX6-EK140 的内核,请使用 $ make myimx6ul_defconfig <br> | ||
| + | <span style="background:#CCCCCC">if what compified is kernel of MY-IMX6-EK140,please use $ make myimx6ul_defconfig</span><br> | ||
这里以 myimx6_defconfig 为例。<br> | 这里以 myimx6_defconfig 为例。<br> | ||
| + | <span style="background:#CCCCCC">take myimx6_defconfig as an example。</span><br> | ||
[[文件:myimx6linux3.14_build_6.2.3.1.png]]<br> | [[文件:myimx6linux3.14_build_6.2.3.1.png]]<br> | ||
| − | == '''编译内核''' == | + | |
| + | == '''编译内核(compife kernel)''' == | ||
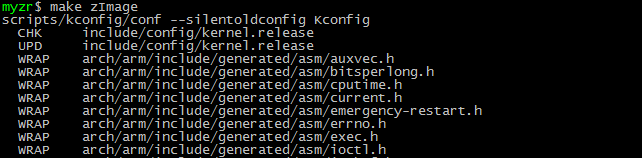
* 执行编译 <br> | * 执行编译 <br> | ||
| + | <span style="background:#CCCCCC">execute compilation</span><br> | ||
$ make zImage <br> | $ make zImage <br> | ||
[[文件:Myimx6linux3.14_build_6.3.0.1.png]]<br> | [[文件:Myimx6linux3.14_build_6.3.0.1.png]]<br> | ||
| + | |||
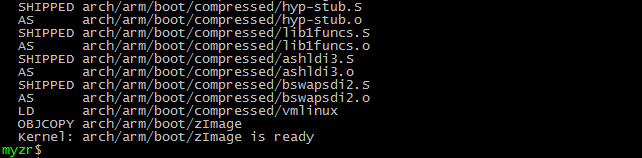
* 编译完成<br> | * 编译完成<br> | ||
| + | <span style="background:#CCCCCC">complete compilation</span><br> | ||
[[文件:Myimx6linux3.14_build_6.3.0.2.png]]<br> | [[文件:Myimx6linux3.14_build_6.3.0.2.png]]<br> | ||
| + | |||
* 目标文件 <br> | * 目标文件 <br> | ||
| + | <span style="background:#CCCCCC">target file</span><br> | ||
arch/arm/boot/zImage即为编译得到的内核文件,使用ls命令可查看文件信息。<br> | arch/arm/boot/zImage即为编译得到的内核文件,使用ls命令可查看文件信息。<br> | ||
| + | <span style="background:#CCCCCC">arch/arm/boot/zImage is the kernel file compifed,you can check file information with ls command。</span><br> | ||
$ ls arch/arm/boot/zImage -la <br> | $ ls arch/arm/boot/zImage -la <br> | ||
[[文件:Myimx6linux3.14_build_6.3.0.3.png]]<br> | [[文件:Myimx6linux3.14_build_6.3.0.3.png]]<br> | ||
| + | |||
注意:我们烧录及启动的内核文件名为“zImage-myimx6”,所以我们需要把zImage复制为zImage-myimx6。<br> | 注意:我们烧录及启动的内核文件名为“zImage-myimx6”,所以我们需要把zImage复制为zImage-myimx6。<br> | ||
| + | <span style="background:#CCCCCC">Note: The kernel file name which is going to be programed and started is “zImage-myimx6”, So we should Copy zImage as zImage-myimx6</span><br> | ||
$ cp arch/arm/boot/zImage ~/my-imx6/04_image/image-linux-31452/zImage-myimx6 <br> | $ cp arch/arm/boot/zImage ~/my-imx6/04_image/image-linux-31452/zImage-myimx6 <br> | ||
[[文件:Myimx6linux3.14_build_6.3.0.4.png]]<br> | [[文件:Myimx6linux3.14_build_6.3.0.4.png]]<br> | ||
| − | == '''编译设备树''' == | + | |
| + | |||
| + | == '''编译设备树(compife device tree)''' == | ||
评估板型号规格与设备树文件对应关系见下表:<br> | 评估板型号规格与设备树文件对应关系见下表:<br> | ||
| + | <span style="background:#CCCCCC">The correspondence between the type of evaluation board and device tree is shown below:</span><br> | ||
| + | |||
{| class="wikitable" | {| class="wikitable" | ||
|- | |- | ||
| − | ! | + | ! 评估板主型号<br>(development main model) || CPU类型-内存容量<br>(CPU type-memory capacity) || 对应的设备树文件<br>(corresponding device tree file) |
|- | |- | ||
|rowspan=7|MY-IMX6-EK200 | |rowspan=7|MY-IMX6-EK200 | ||
| 第344行: | 第486行: | ||
*以MY-IMX6-EK200-6Q-1G为例<br> | *以MY-IMX6-EK200-6Q-1G为例<br> | ||
| + | <span style="background:#CCCCCC">take MY-IMX6-EK200-6Q-1G as example</span><br> | ||
$ make myimx6ek200-6q.dtb<br> | $ make myimx6ek200-6q.dtb<br> | ||
[[文件:Myimx6linux3.14_build_6.4.0.1.png]]<br> | [[文件:Myimx6linux3.14_build_6.4.0.1.png]]<br> | ||
| + | |||
*目标文件 <br> | *目标文件 <br> | ||
| + | <span style="background:#CCCCCC">target file</span><br> | ||
使用ls命令可查看编译得到的目标设备树文件信息: <br> | 使用ls命令可查看编译得到的目标设备树文件信息: <br> | ||
| + | <span style="background:#CCCCCC">You can browse the target device tree file information from compilation with ls command:</span><br> | ||
$ ls arch/arm/boot/dts/myimx6ek*.dtb <br> | $ ls arch/arm/boot/dts/myimx6ek*.dtb <br> | ||
[[文件:Myimx6linux3.14_build_6.4.0.2.png]]<br> | [[文件:Myimx6linux3.14_build_6.4.0.2.png]]<br> | ||
| + | |||
复制设备树文件到镜像目录 <br> | 复制设备树文件到镜像目录 <br> | ||
| + | <span style="background:#CCCCCC">Copy device tree file to image directory</span><br> | ||
$ cp arch/arm/boot/dts/myimx6ek*.dtb ~/my-imx6/04_image/image-linux-31452/ <br> | $ cp arch/arm/boot/dts/myimx6ek*.dtb ~/my-imx6/04_image/image-linux-31452/ <br> | ||
[[文件:Myimx6linux3.14_build_6.4.0.3.png]]<br> | [[文件:Myimx6linux3.14_build_6.4.0.3.png]]<br> | ||
| − | == '''编译模块 ''' == | + | |
| + | == '''编译模块 (compife module)''' == | ||
* 编译模块命令 <br> | * 编译模块命令 <br> | ||
| + | <span style="background:#CCCCCC">compile module command</span><br> | ||
$ make modules<br> | $ make modules<br> | ||
[[文件:Myimx6linux3.14_build_6.5.0.1.png]]<br> | [[文件:Myimx6linux3.14_build_6.5.0.1.png]]<br> | ||
| + | |||
* 安装模块到指定目录<br> | * 安装模块到指定目录<br> | ||
| + | <span style="background:#CCCCCC">Install module to the specified directory</span><br> | ||
$ make modules_install INSTALL_MOD_PATH=./modules<br> | $ make modules_install INSTALL_MOD_PATH=./modules<br> | ||
[[文件:Myimx6linux3.14_build_6.5.0.2.png]]<br> | [[文件:Myimx6linux3.14_build_6.5.0.2.png]]<br> | ||
| + | |||
* 打包模块文件<br> | * 打包模块文件<br> | ||
| + | <span style="background:#CCCCCC">package the module file</span><br> | ||
$ cd modules<br> | $ cd modules<br> | ||
$ tar cjf ../modules.tar.bz2 *<br> | $ tar cjf ../modules.tar.bz2 *<br> | ||
[[文件:Myimx6linux3.14_build_6.5.0.3.png]]<br> | [[文件:Myimx6linux3.14_build_6.5.0.3.png]]<br> | ||
| + | |||
* 复制模块包到镜像目录<br> | * 复制模块包到镜像目录<br> | ||
| + | <span style="background:#CCCCCC">Copy module package to image directory</span><br> | ||
{| class="wikitable" | {| class="wikitable" | ||
|- | |- | ||
| − | !评估板型号 || 目标模块包 | + | !评估板型号<br>(development board model) || 目标模块包<br>(target module package) |
|- | |- | ||
|MY-IMX6-EK200 || rowspan=3|kernel-modules-myimx6.tar.bz2 | |MY-IMX6-EK200 || rowspan=3|kernel-modules-myimx6.tar.bz2 | ||
| 第381行: | 第537行: | ||
$ cp ../modules.tar.bz2 ~/my-imx6/04_image/image-linux-31452/kernel-modules-myimx6.tar.bz2<br> | $ cp ../modules.tar.bz2 ~/my-imx6/04_image/image-linux-31452/kernel-modules-myimx6.tar.bz2<br> | ||
注意:如果是编译内核时配置文件使用的是 myimx6_defconfig,在这里要把 modules.tar.bz2 复制为 kernel-modules-myimx6.tar.bz2;如果是编译内核时配置文件使用的是 myimx6ul_defconfig,在这里要把 modules.tar.bz2 复制为 kernel-modules-myimx6g.tar.bz2<br> | 注意:如果是编译内核时配置文件使用的是 myimx6_defconfig,在这里要把 modules.tar.bz2 复制为 kernel-modules-myimx6.tar.bz2;如果是编译内核时配置文件使用的是 myimx6ul_defconfig,在这里要把 modules.tar.bz2 复制为 kernel-modules-myimx6g.tar.bz2<br> | ||
| + | <span style="background:#CCCCCC">Note:when you compile the Kernel If the configuration file you use is myimx6_defconfig, here you should Copy modules.tar.bz2 as kernel-modules-myimx6.tar.bz2.If the configuration file is | ||
| + | myimx6ul_defconfig,you should Copy modules.tar.bz2 as kernel-modules-myimx6g.tar.bz2.</span><br> | ||
| − | = '''应用程序编译''' = | + | |
| + | = '''应用程序编译(application compilation)''' = | ||
---- | ---- | ||
| − | == '''Linux应用程序编译''' == | + | == '''Linux应用程序编译(Linux application compilation)''' == |
| − | === 编写应用程序 === | + | |
| + | === 编写应用程序(write an application) === | ||
* 创建应用程序的源码目录和Linux-3.14.52的可执行程序目录<br> | * 创建应用程序的源码目录和Linux-3.14.52的可执行程序目录<br> | ||
| + | <span style="background:#CCCCCC">Create application source code directory and Linux-3.14.52 executable program directory</span><br> | ||
$ mkdir ~/my-demo/source_code -p<br> | $ mkdir ~/my-demo/source_code -p<br> | ||
[[文件:Myimx6linux3.14_build_8.1.1.1.png]]<br> | [[文件:Myimx6linux3.14_build_8.1.1.1.png]]<br> | ||
| + | |||
$ mkdir ~/my-demo/bin-l31452 -p<br> | $ mkdir ~/my-demo/bin-l31452 -p<br> | ||
[[文件:Myimx6linux3.14_build_8.1.1.2.png]]<br> | [[文件:Myimx6linux3.14_build_8.1.1.2.png]]<br> | ||
| + | |||
* 编写源代码<br> | * 编写源代码<br> | ||
| + | <span style="background:#CCCCCC">write source code</span><br> | ||
$ cd ~/my-demo/source_code<br> | $ cd ~/my-demo/source_code<br> | ||
$ vi hello.c<br> | $ vi hello.c<br> | ||
| + | |||
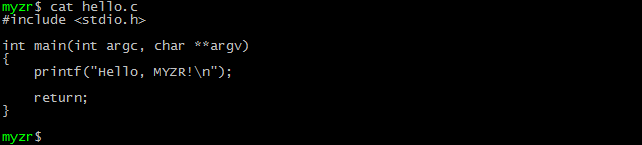
写入以下代码并保存 <br> | 写入以下代码并保存 <br> | ||
| + | <span style="background:#CCCCCC">write following code and save</span><br> | ||
#include <stdio.h> <br> | #include <stdio.h> <br> | ||
<br> | <br> | ||
| 第404行: | 第570行: | ||
} <br> | } <br> | ||
* 查看代码 <br> | * 查看代码 <br> | ||
| + | <span style="background:#CCCCCC">view code</span><br> | ||
[[文件:Myimx6linux3.14_build_8.1.1.3.png]]<br> | [[文件:Myimx6linux3.14_build_8.1.1.3.png]]<br> | ||
| + | |||
$ cat hello.c<br> | $ cat hello.c<br> | ||
| − | === 编译应用程序 === | + | === 编译应用程序(compife application) === |
* 配置环境变量<br> | * 配置环境变量<br> | ||
| + | <span style="background:#CCCCCC">Configure environment variables</span><br> | ||
$ source ~/my-imx6/03_tools/gcc-linaro-arm-linux-gnueabihf-492-env<br> | $ source ~/my-imx6/03_tools/gcc-linaro-arm-linux-gnueabihf-492-env<br> | ||
[[文件:Myimx6linux3.14_build_8.1.2.1.png]]<br> | [[文件:Myimx6linux3.14_build_8.1.2.1.png]]<br> | ||
| + | |||
* 编译 <br> | * 编译 <br> | ||
| + | <span style="background:#CCCCCC">compife</span><br> | ||
$ ${CROSS_COMPILE}gcc hello.c -o hello.out<br> | $ ${CROSS_COMPILE}gcc hello.c -o hello.out<br> | ||
[[文件:Myimx6linux3.14_build_8.1.2.2.png]]<br> | [[文件:Myimx6linux3.14_build_8.1.2.2.png]]<br> | ||
注意:上面的命令有包含“$”号,即“${CROSS_COMPILE}gcc”,是引用我们source时产生的环境变量。 <br> | 注意:上面的命令有包含“$”号,即“${CROSS_COMPILE}gcc”,是引用我们source时产生的环境变量。 <br> | ||
| + | <span style="background:#CCCCCC">Note:The above command contains “$”,which is “${CROSS_COMPILE}gcc”. It is the environment variable generated when referring to our source.。 </span><br> | ||
| + | |||
* 目标文件 <br> | * 目标文件 <br> | ||
| + | <span style="background:#CCCCCC">target file</span><br> | ||
$ file hello.out<br> | $ file hello.out<br> | ||
[[文件:Myimx6linux3.14_build_8.1.2.3.png]]<br> | [[文件:Myimx6linux3.14_build_8.1.2.3.png]]<br> | ||
可以看到目标文件 hello.out 的属性。<br> | 可以看到目标文件 hello.out 的属性。<br> | ||
| + | <span style="background:#CCCCCC">you can see the property of target file hello.out。</span><br> | ||
| − | === 保存目标可执行文件 === | + | |
| + | === 保存目标可执行文件(save target executable file) === | ||
$ mv hello.out ~/my-demo/bin-l31452/<br> | $ mv hello.out ~/my-demo/bin-l31452/<br> | ||
[[文件:Myimx6linux3.14_build_8.1.3.1.png]]<br> | [[文件:Myimx6linux3.14_build_8.1.3.1.png]]<br> | ||
| − | == '''QT应用程序编译 ''' == | + | |
| − | === 准备QT5程序代码 === | + | == '''QT应用程序编译 (QT application compife)''' == |
| + | === 准备QT5程序代码(prepare QT5 program code) === | ||
提示:这里我们使用“Qt5_NMap_CarouselDemo_1.0.tgz”进行演示。 <br> | 提示:这里我们使用“Qt5_NMap_CarouselDemo_1.0.tgz”进行演示。 <br> | ||
| + | <span style="background:#CCCCCC">Tips:Here We demonstrate with “Qt5_NMap_CarouselDemo_1.0.tgz".</span><br> | ||
1)将代码包复制到Linux开发主机 <br> | 1)将代码包复制到Linux开发主机 <br> | ||
| + | <span style="background:#CCCCCC">copy code package to Linux development host</span><br> | ||
将代码包“Qt5_NMap_CarouselDemo_1.0.tgz”复制到“~/my-demo/source_code”。<br> | 将代码包“Qt5_NMap_CarouselDemo_1.0.tgz”复制到“~/my-demo/source_code”。<br> | ||
| + | <span style="background:#CCCCCC">copy code package“Qt5_NMap_CarouselDemo_1.0.tgz”to“~/my-demo/source_code”。</span><br> | ||
这一步自己采取相应的操作完成。<br> | 这一步自己采取相应的操作完成。<br> | ||
| + | <span style="background:#CCCCCC">complete this step by yourself in a proper way。</span><br> | ||
| + | |||
2)解压代码包 <br> | 2)解压代码包 <br> | ||
| + | <span style="background:#CCCCCC">decompress code package</span><br> | ||
$ cd ~/my-demo/source_code<br> | $ cd ~/my-demo/source_code<br> | ||
$ tar zxf Qt5_NMap_CarouselDemo_1.0.tgz<br> | $ tar zxf Qt5_NMap_CarouselDemo_1.0.tgz<br> | ||
[[文件:Myimx6linux3.14_build_8.2.1.1.png]]<br> | [[文件:Myimx6linux3.14_build_8.2.1.1.png]]<br> | ||
| − | === 编译QT5程序 === | + | |
| + | |||
| + | === 编译QT5程序(compile QT5 application) === | ||
提示:我们将使用命令行编译。<br> | 提示:我们将使用命令行编译。<br> | ||
| + | <span style="background:#CCCCCC">Tips: We compile with commands。</span><br> | ||
1)进入代码目录 <br> | 1)进入代码目录 <br> | ||
| + | <span style="background:#CCCCCC">enter code directory</span><br> | ||
提示:我们前面将代码包“Qt5_NMap_CarouselDemo_1.0.tgz”解压在“~/my-demo/source_code”。<br> | 提示:我们前面将代码包“Qt5_NMap_CarouselDemo_1.0.tgz”解压在“~/my-demo/source_code”。<br> | ||
| + | <span style="background:#CCCCCC">tips:first we decompress code package“Qt5_NMap_CarouselDemo_1.0.tgz”to“~/my-demo/source_code”。</span><br> | ||
$ cd ~/my-demo/source_code/Qt5_NMap_CarouselDemo_1.0/<br> | $ cd ~/my-demo/source_code/Qt5_NMap_CarouselDemo_1.0/<br> | ||
| + | |||
2)检查QMake<br> | 2)检查QMake<br> | ||
| + | <span style="background:#CCCCCC">check QMake</span><br> | ||
$ qmake –v<br> | $ qmake –v<br> | ||
[[文件:Myimx6linux3.14_build_8.2.2.2.png]]<br> | [[文件:Myimx6linux3.14_build_8.2.2.2.png]]<br> | ||
如果执行命令后当前终端有输出“QMake version 3.0”,则表示交叉编译工具配置正常。 | 如果执行命令后当前终端有输出“QMake version 3.0”,则表示交叉编译工具配置正常。 | ||
| + | <span style="background:#CCCCCC">If the current terminal output has “QMake version 3.0” after the execution of command,that means cross compiler is Configured normally..</span><br> | ||
否则需要执行下面的命令:<br> | 否则需要执行下面的命令:<br> | ||
| + | <span style="background:#CCCCCC">Otherwise you need to execute the command below:</span><br> | ||
$ source /opt/fsl-imx-x11/3.14.52-1.1.0/environment-setup-cortexa9hf-vfp-neon-poky-linux-gnueabi<br> | $ source /opt/fsl-imx-x11/3.14.52-1.1.0/environment-setup-cortexa9hf-vfp-neon-poky-linux-gnueabi<br> | ||
| + | |||
3)生成Makefile文件<br> | 3)生成Makefile文件<br> | ||
| + | <span style="background:#CCCCCC">creat Makefile</span><br> | ||
$ qmake<br> | $ qmake<br> | ||
[[文件:Myimx6linux3.14_build_8.2.2.3.png]]<br> | [[文件:Myimx6linux3.14_build_8.2.2.3.png]]<br> | ||
执行qmake后通过ls可以看到多了Makefile文件<br> | 执行qmake后通过ls可以看到多了Makefile文件<br> | ||
| + | <span style="background:#CCCCCC">you can see an extra Makefile with ls after execution of qmake</span><br> | ||
| + | |||
4)编译<br> | 4)编译<br> | ||
| + | <span style="background:#CCCCCC">compile</span><br> | ||
$ make<br> | $ make<br> | ||
[[文件:Myimx6linux3.14_build_8.2.2.4.png]]<br> | [[文件:Myimx6linux3.14_build_8.2.2.4.png]]<br> | ||
| + | |||
5)目标文件<br> | 5)目标文件<br> | ||
| + | <span style="background:#CCCCCC">target file</span><br> | ||
* 可执行文件<br> | * 可执行文件<br> | ||
| + | <span style="background:#CCCCCC">target file</span><br> | ||
$ file Qt5_NMap_CarouselDemo<br> | $ file Qt5_NMap_CarouselDemo<br> | ||
[[文件:Myimx6linux3.14_build_8.2.2.5.png]]<br> | [[文件:Myimx6linux3.14_build_8.2.2.5.png]]<br> | ||
| + | |||
* 资源文件<br> | * 资源文件<br> | ||
| + | <span style="background:#CCCCCC">source file</span><br> | ||
QT5程序的运行需要对应的qml文件和content<br> | QT5程序的运行需要对应的qml文件和content<br> | ||
| + | <span style="background:#CCCCCC">Running QT5 needs the corresponding qml file and content</span><br> | ||
[[文件:Myimx6linux3.14_build_8.2.2.6.png]]<br> | [[文件:Myimx6linux3.14_build_8.2.2.6.png]]<br> | ||
| − | === 保存目标可执行文件 === | + | |
| + | === 保存目标可执行文件(save target executable file) === | ||
由于QT5程序的运行需要对应的qml文件和content文件,这里我们为了操作的简洁,直接将整个目录复制到目标目录<br> | 由于QT5程序的运行需要对应的qml文件和content文件,这里我们为了操作的简洁,直接将整个目录复制到目标目录<br> | ||
| + | <span style="background:#CCCCCC">Because running QT5 program requires qml file and content file, here We copy the entire directory to the target directory for simplicity.</span><br> | ||
$ cp ../Qt5_NMap_CarouselDemo_1.0 ~/my-demo/bin-l31452/ -a<br> | $ cp ../Qt5_NMap_CarouselDemo_1.0 ~/my-demo/bin-l31452/ -a<br> | ||
[[文件:Myimx6linux3.14_build_8.2.3.1.png]]<br> | [[文件:Myimx6linux3.14_build_8.2.3.1.png]]<br> | ||
| − | == '''应用程序打包''' == | + | |
| − | === 说明 === | + | |
| + | == '''应用程序打包(package application)''' == | ||
| + | === 说明(instruction) === | ||
烧录工具支持烧录“my-demo.tar.xz”的文件包到评估板。所以在这里我们把我们需要的应用程序打包为“my-demo.tar.xz”。至于“my-demo.tar.xz”会被烧录到哪个位置,请看《烧录手册》。<br> | 烧录工具支持烧录“my-demo.tar.xz”的文件包到评估板。所以在这里我们把我们需要的应用程序打包为“my-demo.tar.xz”。至于“my-demo.tar.xz”会被烧录到哪个位置,请看《烧录手册》。<br> | ||
| − | === 打包应用程序 === | + | <span style="background:#CCCCCC">Programming tool supports to program “my-demo.tar.xz” file package to evaluation board.So We package applications We need as “my-demo.tar.xz”.while where “my-demo.tar.xz” will be programmed ,refer to 《burning manual》。</span><br> |
| + | |||
| + | |||
| + | === 打包应用程序(package application) === | ||
1)打包<br> | 1)打包<br> | ||
| + | <span style="background:#CCCCCC">package</span><br> | ||
这里我们将整个my-demo目录打包。<br> | 这里我们将整个my-demo目录打包。<br> | ||
| + | <span style="background:#CCCCCC">Here We package the whole my-demo directory。</span><br> | ||
$ cd ~<br> | $ cd ~<br> | ||
$ tar cjf my-demo.tar.bz2 my-demo<br> | $ tar cjf my-demo.tar.bz2 my-demo<br> | ||
[[文件:Myimx6linux3.14_build_8.3.2.1.png]]<br> | [[文件:Myimx6linux3.14_build_8.3.2.1.png]]<br> | ||
| + | |||
2)复制应用程序包为目标烧录文件<br> | 2)复制应用程序包为目标烧录文件<br> | ||
| + | <span style="background:#CCCCCC">Copy application package as target programming file</span><br> | ||
$ cp my-demo.tar.bz2 ~/my-imx6/04_image/image-linux-31452/<br> | $ cp my-demo.tar.bz2 ~/my-imx6/04_image/image-linux-31452/<br> | ||
[[文件:Myimx6linux3.14_build_8.3.2.2.png]]<br> | [[文件:Myimx6linux3.14_build_8.3.2.2.png]]<br> | ||
| − | = '''目标烧录文件''' = | + | |
| + | = '''目标烧录文件(target programming file)''' = | ||
---- | ---- | ||
至此,我们在“~/my-imx6/04_image/image-linux-31452/”得到了除文件系统以外的一套烧录文件。包括“uboot*.imx”、“myimx6*.dtb”、“zImage-myimx6”、“kernel-modules.tar.bz2”、“my-demo.tar.bz2”。<br> | 至此,我们在“~/my-imx6/04_image/image-linux-31452/”得到了除文件系统以外的一套烧录文件。包括“uboot*.imx”、“myimx6*.dtb”、“zImage-myimx6”、“kernel-modules.tar.bz2”、“my-demo.tar.bz2”。<br> | ||
| + | <span style="background:#CCCCCC">So far,we get a set of programming file except file system from“~/my-imx6/04_image/image-linux-31452/”。including“uboot*.imx”、“myimx6*.dtb”、“zImage-myimx6”、“kernel-modules.tar.bz2”、“my-demo.tar.bz2”。</span><br> | ||
现在可以参照《烧录手册》烧录我们自己编译出来的image了。<br> | 现在可以参照《烧录手册》烧录我们自己编译出来的image了。<br> | ||
| − | == '''在评估板上运行应用程序 ''' == | + | <span style="background:#CCCCCC">Now we can program the image we compiled by ourselves referring to programming manual.</span><br> |
| + | |||
| + | |||
| + | == '''在评估板上运行应用程序 (run application on the evaluation board)''' == | ||
烧录系统之后,对评估板重新上电,登录系统后并执行以下命令。<br> | 烧录系统之后,对评估板重新上电,登录系统后并执行以下命令。<br> | ||
| + | <span style="background:#CCCCCC">After the burning, supply power for evaluation board,login system and execute commands below.</span><br> | ||
# /home/root/my-demo/bin-l31452/hello.out<br> | # /home/root/my-demo/bin-l31452/hello.out<br> | ||
# export DISPLAY=:0 <br> | # export DISPLAY=:0 <br> | ||
# /home/root/my-demo/bin-l31452/Qt5_NMap_CarouselDemo_1.0/Qt5_NMap_CarouselDemo<br> | # /home/root/my-demo/bin-l31452/Qt5_NMap_CarouselDemo_1.0/Qt5_NMap_CarouselDemo<br> | ||
| − | = '''附:文件系统编译''' = | + | |
| + | |||
| + | = '''附:文件系统编译(Appendix:file system compilation)''' = | ||
注意及说明:<br> | 注意及说明:<br> | ||
| + | <span style="background:#CCCCCC">notes and instructions:</span><br> | ||
1)原始编译的过程中的下载量会超过4G。(提示:可以使用我们下载好的一些文件,以减少下载量,节约时间,在7.4中会说到)。 <br> | 1)原始编译的过程中的下载量会超过4G。(提示:可以使用我们下载好的一些文件,以减少下载量,节约时间,在7.4中会说到)。 <br> | ||
| + | <span style="background:#CCCCCC">The download of the original compilation exceed 4G。(tips:you can use files we have downloaded in order to reduce downloads and save time,which is going to be mentioned in 7.4)。</span><br> | ||
| + | |||
2)编译主机的网络连接最好使用能访问www.fackbook.com 的网络,不然可能会受到境内防火墙的限制而无法下载编译需要的软件包。 <br> | 2)编译主机的网络连接最好使用能访问www.fackbook.com 的网络,不然可能会受到境内防火墙的限制而无法下载编译需要的软件包。 <br> | ||
| + | <span style="background:#CCCCCC">The network of the compilation host is good to access to www.fackbook.com .Otherwise It may be subject to the condition of the domestic firewall and It is unable to download the software for compilation.</span><br> | ||
| + | |||
3)初次编译需要的时间根据网络状态及编译主机的配置需要2小时到无限时间(经粗略统计除去下载时间,在16核CPU、16G内存的主机上编译QT5系统用了大约100分钟。) <br> | 3)初次编译需要的时间根据网络状态及编译主机的配置需要2小时到无限时间(经粗略统计除去下载时间,在16核CPU、16G内存的主机上编译QT5系统用了大约100分钟。) <br> | ||
| + | <span style="background:#CCCCCC">The initial compilation may take 2 hours to unlimited time.It depends on the network state and the configuration of the host.(After a rough statistics, It took about 100 minutes to compile QT5 system on the 16-core CPU 16 G memory host except download time。)</span><br> | ||
客户请根据实际情况决定是否自行编译文件系统或使用我们提供的文件系统。如果我们提供的文件系统能够满足需求,建议不要自行编译,因为编译过程可能会出现很多错误。<br> | 客户请根据实际情况决定是否自行编译文件系统或使用我们提供的文件系统。如果我们提供的文件系统能够满足需求,建议不要自行编译,因为编译过程可能会出现很多错误。<br> | ||
| − | == '''准备编译 ''' == | + | <span style="background:#CCCCCC">Customer may decide whether to compile the file system or use the file system We provide based on the actual situation. If the file system we provide meets the requirements, you had better not to compile by yourself. Since It may be a lot of errors during compilation.</span><br> |
| − | === 安装软件包 === | + | |
| + | |||
| + | == '''准备编译 (Prepare for compilation)''' == | ||
| + | === 安装软件包(install software package) === | ||
说明,Yocto编译依赖一些软件包,所以需要在开发主机上进行安装。 <br> | 说明,Yocto编译依赖一些软件包,所以需要在开发主机上进行安装。 <br> | ||
| + | <span style="background:#CCCCCC">instruction,Yocto compilation relies on some software package. So you need to Install them on the host。</span><br> | ||
$ sudo apt-get install gawk wget git-core diffstat unzip texinfo \<br> | $ sudo apt-get install gawk wget git-core diffstat unzip texinfo \<br> | ||
gcc-multilib build-essential chrpath socat <br> | gcc-multilib build-essential chrpath socat <br> | ||
[[文件:Myimx6linux3.14_build_10.1.1.1.png]]<br> | [[文件:Myimx6linux3.14_build_10.1.1.1.png]]<br> | ||
| + | |||
$ sudo apt-get install libsdl1.2-dev xterm sed cvs subversion \<br> | $ sudo apt-get install libsdl1.2-dev xterm sed cvs subversion \<br> | ||
coreutils texi2html docbook-utils python-pysqlite2 help2man make gcc \<br> | coreutils texi2html docbook-utils python-pysqlite2 help2man make gcc \<br> | ||
| 第503行: | 第736行: | ||
autoconf automake groff curl lzop asciidoc <br> | autoconf automake groff curl lzop asciidoc <br> | ||
[[文件:Myimx6linux3.14_build_10.1.1.2.png]]<br> | [[文件:Myimx6linux3.14_build_10.1.1.2.png]]<br> | ||
| + | |||
$ sudo apt-get install uboot-mkimage <br> | $ sudo apt-get install uboot-mkimage <br> | ||
[[文件:Myimx6linux3.14_build_10.1.1.3.png]]<br> | [[文件:Myimx6linux3.14_build_10.1.1.3.png]]<br> | ||
| − | === 准备源码 === | + | |
| + | |||
| + | === 准备源码(prepare source code) === | ||
1)下载源码 <br> | 1)下载源码 <br> | ||
| + | <span style="background:#CCCCCC">download source code</span><br> | ||
在网盘中下载 yocto__imx-3.14.52-1.1.0_ga.tar.xz<br> | 在网盘中下载 yocto__imx-3.14.52-1.1.0_ga.tar.xz<br> | ||
| + | <span style="background:#CCCCCC">from network disk download yocto__imx-3.14.52-1.1.0_ga.tar.xz</span><br> | ||
| + | |||
2)创建工作目录 <br> | 2)创建工作目录 <br> | ||
| + | <span style="background:#CCCCCC">create working directory</span><br> | ||
$ mkdir ~/yocto<br> | $ mkdir ~/yocto<br> | ||
[[文件:Myimx6linux3.14_build_10.1.2.1.png]]<br> | [[文件:Myimx6linux3.14_build_10.1.2.1.png]]<br> | ||
| + | |||
3)将源码包复制到工作目录<br> | 3)将源码包复制到工作目录<br> | ||
| + | <span style="background:#CCCCCC">Copy source code package to working directory</span><br> | ||
复制“yocto__imx-3.14.52-1.1.0_ga.tar.xz”到“~/my-imx6/02_source”。<br> | 复制“yocto__imx-3.14.52-1.1.0_ga.tar.xz”到“~/my-imx6/02_source”。<br> | ||
| + | <span style="background:#CCCCCC">copy“yocto__imx-3.14.52-1.1.0_ga.tar.xz”to“~/my-imx6/02_source”。</span><br> | ||
这一步骤自己采取相应的方式进行 <br> | 这一步骤自己采取相应的方式进行 <br> | ||
| + | <span style="background:#CCCCCC">complete this step by yourself in a proper way</span><br> | ||
| + | |||
4) 解压源码包<br> | 4) 解压源码包<br> | ||
| + | <span style="background:#CCCCCC">decompress source code package</span><br> | ||
$ cd ~/yocto/ <br> | $ cd ~/yocto/ <br> | ||
$ tar xf yocto__imx-3.14.52-1.1.0_ga.tar.xz<br> | $ tar xf yocto__imx-3.14.52-1.1.0_ga.tar.xz<br> | ||
[[文件:Myimx6linux3.14_build_10.1.2.2.png]]<br> | [[文件:Myimx6linux3.14_build_10.1.2.2.png]]<br> | ||
| − | === 准备编译需要的软件包 === | + | |
| + | |||
| + | === 准备编译需要的软件包(Prepare software package required for compilation) === | ||
提示1:如果自己网络状况好且能访问境外网站,可以跳过这一节内容。 <br> | 提示1:如果自己网络状况好且能访问境外网站,可以跳过这一节内容。 <br> | ||
| + | <span style="background:#CCCCCC">tips1:If you have a good network and can access a foreign website ,you can skip this section.</span><br> | ||
提示2:如果是使用我们下载好的一些包,请继续往下。 <br> | 提示2:如果是使用我们下载好的一些包,请继续往下。 <br> | ||
| + | <span style="background:#CCCCCC">tips2:If you use the package we have downloaded, please go on to the next step.</span><br> | ||
提示3:限于网络上传速度的影响及软件包的更新,我们下载的软件包目录中可能不包括<br> | 提示3:限于网络上传速度的影响及软件包的更新,我们下载的软件包目录中可能不包括<br> | ||
| + | <span style="background:#CCCCCC"></span><br> | ||
编译需要的全部软件包,但是编译中缺少的软件包编译程序会在编译过程中自行下载。 <br> | 编译需要的全部软件包,但是编译中缺少的软件包编译程序会在编译过程中自行下载。 <br> | ||
| + | <span style="background:#CCCCCC">tips3:As a result of the upload speed and the update of software package , the software package directory we downloaded may not include all the required software packages for compilation.But the compiler package that is missing from compilation will be downloaded on its own during compilation process.</span><br> | ||
| + | |||
1)下载软件包 <br> | 1)下载软件包 <br> | ||
| + | <span style="background:#CCCCCC">download software package</span><br> | ||
在网盘中下载downloads文件夹(目前该文件夹大小在6 ~ 8G)。 <br> | 在网盘中下载downloads文件夹(目前该文件夹大小在6 ~ 8G)。 <br> | ||
| + | <span style="background:#CCCCCC">download downloads folder on the network disk(currently, the folder size is 6~8G)。</span><br> | ||
| + | |||
2)将软件包复制到BSP目录 <br> | 2)将软件包复制到BSP目录 <br> | ||
| + | <span style="background:#CCCCCC">copy software package to BSP directory</span><br> | ||
将downloads移动到 “~/yocto/imx-3.14.52-1.1.0_ga” 目录<br> | 将downloads移动到 “~/yocto/imx-3.14.52-1.1.0_ga” 目录<br> | ||
| + | <span style="background:#CCCCCC">move downloads to “~/yocto/imx-3.14.52-1.1.0_ga” directory</span><br> | ||
这一步自己采取相应的方法完成。 <br> | 这一步自己采取相应的方法完成。 <br> | ||
| − | == '''编译 ''' == | + | <span style="background:#CCCCCC">complete this step by yourself in a proper way。</span><br> |
| − | === 更新BSP === | + | |
| + | |||
| + | == '''编译 (compilation)''' == | ||
| + | === 更新BSP(update BSP) === | ||
$ cd ~/yocto/imx-3.14.52-1.1.0_ga/<br> | $ cd ~/yocto/imx-3.14.52-1.1.0_ga/<br> | ||
[[文件:Myimx6linux3.14_build_10.2.1.1.png]]<br> | [[文件:Myimx6linux3.14_build_10.2.1.1.png]]<br> | ||
| + | |||
$ ./bin/repo sync<br> | $ ./bin/repo sync<br> | ||
[[文件:Myimx6linux3.14_build_10.2.1.2.png]]<br> | [[文件:Myimx6linux3.14_build_10.2.1.2.png]]<br> | ||
| − | === 编译配置 === | + | |
| + | |||
| + | === 编译配置(compilation configuration) === | ||
$ DISTRO=fsl-imx-x11 MACHINE=imx6qsabresd source fsl-setup-release.sh -b build-x11<br> | $ DISTRO=fsl-imx-x11 MACHINE=imx6qsabresd source fsl-setup-release.sh -b build-x11<br> | ||
[[文件:Myimx6linux3.14_build_10.2.2.1.png]]<br> | [[文件:Myimx6linux3.14_build_10.2.2.1.png]]<br> | ||
| + | |||
执行命令后终端会接收到输出的信息,一直按“空格”,在最后的对话中输入y <br> | 执行命令后终端会接收到输出的信息,一直按“空格”,在最后的对话中输入y <br> | ||
| + | <span style="background:#CCCCCC">After executing the command,the terminal will receive the output message, keep pressing "space" ,enter "y" in the final dialog</span><br> | ||
[[文件:Myimx6linux3.14_build_10.2.2.2.png]]<br> | [[文件:Myimx6linux3.14_build_10.2.2.2.png]]<br> | ||
| + | |||
示例:Do you accept the EULA you just read? (y/n) y<br> | 示例:Do you accept the EULA you just read? (y/n) y<br> | ||
| − | === 编译QT5文件系统 === | + | <span style="background:#CCCCCC">example:Do you accept the EULA you just read? (y/n) y</span><br> |
| + | |||
| + | |||
| + | === 编译QT5文件系统(compife QT5文 file system) === | ||
1)执行编译命令<br> | 1)执行编译命令<br> | ||
| + | <span style="background:#CCCCCC">execute compilation command</span><br> | ||
$ bitbake fsl-image-qt5<br> | $ bitbake fsl-image-qt5<br> | ||
[[文件:Myimx6linux3.14_build_10.2.3.1.png]]<br> | [[文件:Myimx6linux3.14_build_10.2.3.1.png]]<br> | ||
| + | |||
提示:整个编译过程除去下载时间,在16核CPU、16G内存的主机上需要1小时左右。 <br> | 提示:整个编译过程除去下载时间,在16核CPU、16G内存的主机上需要1小时左右。 <br> | ||
| + | <span style="background:#CCCCCC">Tips: It takes about one hour to compile on the 16-core CPU and 16G memory host to complete the compilation process except download time.</span><br> | ||
| + | |||
2)目标文件 <br> | 2)目标文件 <br> | ||
| + | <span style="background:#CCCCCC">target file</span><br> | ||
$ ls ./tmp/deploy/images/imx6qsabresd/fsl-image-qt5-imx6qsabresd.tar.bz2<br> | $ ls ./tmp/deploy/images/imx6qsabresd/fsl-image-qt5-imx6qsabresd.tar.bz2<br> | ||
[[文件:Myimx6linux3.14_build_10.2.3.2.png]]<br> | [[文件:Myimx6linux3.14_build_10.2.3.2.png]]<br> | ||
| + | |||
3)复制目标文件<br> | 3)复制目标文件<br> | ||
| + | <span style="background:#CCCCCC">copy target file</span><br> | ||
我们烧录的QT5系统文件名为“distro-fsl-image-qt5.tar.bz2”,所以需要将编译的文件系统复制为“distro-fsl-image-qt5.tar.bz2”。<br> | 我们烧录的QT5系统文件名为“distro-fsl-image-qt5.tar.bz2”,所以需要将编译的文件系统复制为“distro-fsl-image-qt5.tar.bz2”。<br> | ||
| + | <span style="background:#CCCCCC">The QT5 file system name we programmed is “distro-fsl-image-qt5.tar.bz2”, So we need to copy the compiled file as “distro-fsl-image-qt5.tar.bz2”。</span><br> | ||
$ cp ./tmp/deploy/images/imx6qsabresd/fsl-image-qt5-imx6qsabresd.tar.bz2 ~/my-imx6/04_image/image-linux-31452/distro-fsl-image-qt5.tar.bz2<br> | $ cp ./tmp/deploy/images/imx6qsabresd/fsl-image-qt5-imx6qsabresd.tar.bz2 ~/my-imx6/04_image/image-linux-31452/distro-fsl-image-qt5.tar.bz2<br> | ||
[[文件:Myimx6linux3.14_build_10.2.3.3.png]]<br> | [[文件:Myimx6linux3.14_build_10.2.3.3.png]]<br> | ||
| − | === 编译Linux文件系统 === | + | |
| + | |||
| + | === 编译Linux文件系统(compile Linux file system) === | ||
1)执行编译命令<br> | 1)执行编译命令<br> | ||
| + | <span style="background:#CCCCCC">execute compile command</span><br> | ||
$ bitbake fsl-image-machine-test<br> | $ bitbake fsl-image-machine-test<br> | ||
| + | |||
2)目标文件 <br> | 2)目标文件 <br> | ||
| + | <span style="background:#CCCCCC">target file</span><br> | ||
$ ls ./tmp/deploy/images/imx6qsabresd/fsl-image-machine-test-imx6qsabresd.tar.bz2<br> | $ ls ./tmp/deploy/images/imx6qsabresd/fsl-image-machine-test-imx6qsabresd.tar.bz2<br> | ||
[[文件:Myimx6linux3.14_build_10.2.4.1.png]]<br> | [[文件:Myimx6linux3.14_build_10.2.4.1.png]]<br> | ||
| + | |||
3)复制目标文件<br> | 3)复制目标文件<br> | ||
| + | <span style="background:#CCCCCC">copy target file</span><br> | ||
我们烧录的QT5系统文件名为“distro-fsl-image.tar.bz2”,所以需要将编译的文件系统复制为“distro-fsl-image.tar.bz2”。<br> | 我们烧录的QT5系统文件名为“distro-fsl-image.tar.bz2”,所以需要将编译的文件系统复制为“distro-fsl-image.tar.bz2”。<br> | ||
| + | <span style="background:#CCCCCC">The QT5 file system name We programmed is “distro-fsl-image.tar.bz2”, So we need to copy the compiled file as “distro-fsl-image.tar.bz2”</span><br> | ||
$ cp ./tmp/deploy/images/imx6qsabresd/fsl-image-machine-test-imx6qsabresd.tar.bz2 ~/my-imx6/04_image/image-linux-31452/distro-fsl-image.tar.bz2<br> | $ cp ./tmp/deploy/images/imx6qsabresd/fsl-image-machine-test-imx6qsabresd.tar.bz2 ~/my-imx6/04_image/image-linux-31452/distro-fsl-image.tar.bz2<br> | ||
[[文件:Myimx6linux3.14_build_10.2.4.2.png]]<br> | [[文件:Myimx6linux3.14_build_10.2.4.2.png]]<br> | ||
| − | === 编译QT5的交叉编译工具 === | + | |
| + | |||
| + | === 编译QT5的交叉编译工具(compile the cross-compiler tool for QT5) === | ||
如果不需要自定义QT5交叉编译工具,则跳过本小节。<br> | 如果不需要自定义QT5交叉编译工具,则跳过本小节。<br> | ||
| + | <span style="background:#CCCCCC">If you do not need to customize QT5 cross-compiler tool ,skip this section。</span><br> | ||
| + | |||
1)执行编译命令<br> | 1)执行编译命令<br> | ||
| + | <span style="background:#CCCCCC">execute compilation command</span><br> | ||
$ bitbake meta-toolchain-qt5<br> | $ bitbake meta-toolchain-qt5<br> | ||
| + | |||
2)目标文件<br> | 2)目标文件<br> | ||
| + | <span style="background:#CCCCCC">target file</span><br> | ||
在“./tmp/deploy/sdk/”目录下可以找到我们编译生成的目标文件。<br> | 在“./tmp/deploy/sdk/”目录下可以找到我们编译生成的目标文件。<br> | ||
| + | <span style="background:#CCCCCC"></span><br> | ||
[[文件:Myimx6linux3.14_build_10.2.5.1.png]]<br> | [[文件:Myimx6linux3.14_build_10.2.5.1.png]]<br> | ||
| + | |||
3)保存目标文件<br> | 3)保存目标文件<br> | ||
| + | <span style="background:#CCCCCC">save target file</span><br> | ||
将编译得到的“fsl-imx-x11-glibc-x86_64-meta-toolchain-qt5-cortexa9hf-vfp-neon-toolchain-3.14.52-1.1.0.sh”复制到“~/my-imx6/03_tools/”<br> | 将编译得到的“fsl-imx-x11-glibc-x86_64-meta-toolchain-qt5-cortexa9hf-vfp-neon-toolchain-3.14.52-1.1.0.sh”复制到“~/my-imx6/03_tools/”<br> | ||
| + | <span style="background:#CCCCCC">copy“fsl-imx-x11-glibc-x86_64-meta-toolchain-qt5-cortexa9hf-vfp-neon-toolchain-3.14.52-1.1.0.sh”we compiled to“~/my-imx6/03_tools/”</span><br> | ||
| + | |||
4)安装QT5交叉编译工具<br> | 4)安装QT5交叉编译工具<br> | ||
| + | <span style="background:#CCCCCC">Install QT5 cross-compiler tool</span><br> | ||
如果需要使用自己编译的QT5交叉编译工具,需要先删除已经安装的QT5交叉编译工具。并参照前面“安装配置交叉编译工具链”中的“安装QT5交叉编译工具”进行安装。<br> | 如果需要使用自己编译的QT5交叉编译工具,需要先删除已经安装的QT5交叉编译工具。并参照前面“安装配置交叉编译工具链”中的“安装QT5交叉编译工具”进行安装。<br> | ||
| + | <span style="background:#CCCCCC">if you need to use QT5 cross-compiler tool compiled by yourself, you have to remove QT5 cross-compiler tool which has been already Installed. | ||
| + | Install it referring to the "Install QT5 cross-compile tool" of "Install and Configure cross-compile tool chain。</span><br> | ||
2017年6月7日 (三) 15:43的版本
目录
- 1 = 文档说明(document instruction) =
- 2 系统环境说明(system environment instruction)
- 3 操作说明 (operation instruction)
- 4 截图说明(screenshots instruction)
- 5 图片中的Linux命令(Linux command in the image)
- 6 重要信息说明(important information instruction)
- 7 = 准备源码及相关文件(prepare source code and relevant file) =
- 8 源码文件(source code)
- 9 交叉编译工具文件(cross compiler tool file)
- 10 创建工作目录(creat working directory)
- 11 = 安装交叉编译工具链(install cross compiler tool chain) =
- 12 安装Linux交叉编译工具链(install Linux cross compiler tool chain)
- 13 安装QT5交叉编译工具(install QT5 cross compiler tool)
- 14 = U-Boot编译(U-Boot compilation) =
- 15 准备编译(prepare compilation)
- 16 编译(compilation)
- 17 目标文件(target file)
- 18 = 编译内核(compile kernel) =
- 19 准备编译(prepare compilation)
- 20 内核编译配置(kernel compilation configuration)
- 21 编译内核(compife kernel)
- 22 编译设备树(compife device tree)
- 23 编译模块 (compife module)
- 24 = 应用程序编译(application compilation) =
- 25 Linux应用程序编译(Linux application compilation)
- 26 QT应用程序编译 (QT application compife)
- 27 应用程序打包(package application)
- 28 = 目标烧录文件(target programming file) =
- 29 在评估板上运行应用程序 (run application on the evaluation board)
- 30 /home/root/my-demo/bin-l31452/hello.out
- 31 export DISPLAY=:0
- 32 /home/root/my-demo/bin-l31452/Qt5_NMap_CarouselDemo_1.0/Qt5_NMap_CarouselDemo
- 33 附:文件系统编译(Appendix:file system compilation)
= 文档说明(document instruction) =
系统环境说明(system environment instruction)
- 编译主机CPU架构:64位
CUP architeture of host used for compilation:64bit
- 编译主机系统:Linux
system of host:Linux - Linux发行版:Ubuntu
Linux release version:Ubuntu - Ubuntu版本类型:服务器版
Ubuntu version type:server version - Ubuntu版本号:12.04.5
Ubuntu version no.:12.04.5 - Ubuntu系统类型:x86-64
Ubuntu system type:x86-64
注意:开发主机请使用ubuntu 12.04.5 x86-64(桌面版或服务器版均可),使用其他发行版的Linux或Ubuntu的其它版本可能会遇到的不必要的问题。
Note: The development host should use ubuntu 12.04.5 x86-64(desktop and server version are available),Using other distribution of Linux and other versions of Ubuntu may encounter unnecessary problems
</li> </ul>操作说明 (operation instruction)
1)文档中以“$”开头的行,其后是Linux命令。
The line in the document which begins with “$”,which is followed by the Linux command.。
2)文档中所有的Linux命令建议手动输入到Linux主机执行(直接复制、粘贴到Linux主机上执行,可能会执行失败)。
All the Linux commands in the document are recommended to be entered into the host manually for execution.(Copying ,pasting to the host directly to execute may fail)。
3)文档中的Linux执行命令,如果空格后的下一个字符是“-”的(如:sudo apt-get –y install之类的),请手动输入到Linux主机执行(直接复制、粘贴到Linux主机上执行,通常会执行失败)。
In all the Linux execution commands of the document,if the next character after the space is "-",(example:sudo apt-get –y install),please enter into Linux host to execute manually.(Copying ,pasting to the host directly to execute may fail ).)。
4)文档中所有一行没写完的Linux命令请手动输入到Linux主机执行,(因为复制、粘贴命令不能包含类似“换行符”之类的特殊字符)。
any line of Linux commands whichi is not finished is recommended to be entered into the host for execution. (Because copy or paste commands cannot contain special character such as "line breaks")。)。
5)按文档输入并执行Linux命令时注意观察命令的执行结果与文档图片中的是否一致,以确认命令是否输入有误及是否执行失败。
Note whether the execution result is consistent with the document image when you enter and execute the command. check the command was entered incorrectly or failed to execute.。
6)第一遍编译请严格按照文档进行,否则可能出现莫名其妙的错误。
Please follow the document strictly to compile for the first time.Otherwise ,there may be unexpected error。
截图说明(screenshots instruction)
为使视图看起来简洁整齐,截图中的命令提示符统一使用myzr$。
To make the view look neat and tidy , the command prompt in the screenshot should use myzr$ uniformly。
图片中的Linux命令(Linux command in the image)
在文档的图片中观察“myzr$”开头的行可以直观的看到输入的Linux命令。
In the image of the document, you can see the input Linux command visually from the lines that start with “myzr$”。
重要信息说明(important information instruction)
为避免各位客户在搭建开发环境及编译过程中遇到不必要的问题浪费时间和精力,推荐使用明远智睿发布的“vb43-u12045-serv-amd64”虚拟机系统。
To avoid our customers wasting time and energy when they encounter unnecessary problems in building development environment and compiling process,it is recommended to use “vb43-u12045-serv-amd64” virtual machine system released by MYZR。
具体参见 MYZR虚拟机系统指导(details refered to MYZR virtual machine system guidance)
= 准备源码及相关文件(prepare source code and relevant file) =
源码文件(source code)
评估板对应的Linux版本及对应的源码文件见下表:
The corresponding Linux version of the evaluation board and the corresponding source code files are shown in the table below:
评估板型号
(evaluation board model)u-boot源码文件
(u-boot source code)linux源码文件
(linux source code)<thead>
MY-IMX6-EK200 rowspan=4 u-boot-2015.04.tar.xz rowspan=4 linux-3.14.52.tar.xz MY-IMX6-EK314 - MY-IMX6-EK336 - MY-IMX6-EK140 } 交叉编译工具文件(cross compiler tool file)
Linux程序交叉编译工具:gcc-linaro-arm-linux-gnueabihf-4.9-2014.09_linux.tar.xz
Linux program cross compiler tool:gcc-linaro-arm-linux-gnueabihf-4.9-2014.09_linux.tar.xz
Linux交叉编译工具配置文件:gcc-linaro-arm-linux-gnueabihf-492-env
Linux cross compiler tool configuration file:gcc-linaro-arm-linux-gnueabihf-492-env
QT5程序交叉编译工具:fsl-imx-x11-glibc-x86_64-meta-toolchain-qt5-cortexa9hf-vfp-neon-toolchain-3.14.52-1.1.0.sh
QT5 program compiler tool:fsl-imx-x11-glibc-x86_64-meta-toolchain-qt5-cortexa9hf-vfp-neon-toolchain-3.14.52-1.1.0.sh
创建工作目录(creat working directory)
1)源码目录
source code directory
$ mkdir ~/my-imx6/02_source –p

2)工具目录
tool directory
$ mkdir ~/my-imx6/03_tools –p

3)镜像目录
image directory
$ mkdir ~/my-imx6/04_image –p

$ mkdir ~/my-imx6/04_image/image-linux-31452 –p

4)应用程序目录
application diretory
$ mkdir ~/my-demo

= 安装交叉编译工具链(install cross compiler tool chain) =
安装Linux交叉编译工具链(install Linux cross compiler tool chain)
1)进入交叉编译工具链目录
enter cross compiler tool chain diretory
$ cd ~/my-imx6/03_tools/
2)复制Linux交叉编译工具到目录
copy Linux cross compiler tool to directory
将gcc-linaro-arm-linux-gnueabihf-4.9-2014.09_linux.tar.xz复制到“~/my-imx6/03_tools”,这一步自己采取相应的方式完成。
3)解压Linux交叉编译工具
copy gcc-linaro-arm-linux-gnueabihf-4.9-2014.09_linux.tar.xz to“~/my-imx6/03_tools”,complete this step by yourself in a proper way。
$ tar xf gcc-linaro-arm-linux-gnueabihf-4.9-2014.09_linux.tar.xz

4)复制交叉编译工具配置文件
copy cross compiler tool configuration file
将gcc-linaro-arm-linux-gnueabihf-492-env复制到“~/my-imx6/03_tools”,这一步自己采取相应的方式完成。
copy gcc-linaro-arm-linux-gnueabihf-492-env to“~/my-imx6/03_tools”,complete this step by yourself in a proper way。
5)检查安装
check installation
$ source gcc-linaro-arm-linux-gnueabihf-492-env
$ ${CROSS_COMPILE}gcc –v
安装QT5交叉编译工具(install QT5 cross compiler tool)
1)进入交叉编译工具链目录
enter cross compiler tool chain directory
$ cd ~/my-imx6/03_tools/

2)执行安装命令
execute installation command
$ sh fsl-imx-x11-glibc-x86_64-meta-toolchain-qt5-cortexa9hf-vfp-neon-toolchain-3.14.52-1.1.0.sh
3)选择安装路径
choose installation path
执行安装命令后会出现如下提示信息:
after execution of installation command,there will be a following prompt message:
Enter target directory for SDK (default: /opt/fsl-imx-x11/3.14.52-1.1.0):
这时按“回车(Enter)”键,我们保持默认的安装路径。
then press“Enter”key,let's keep defauted installation path。
4)确认安装路径
confirm installation path
之后,会提示如下信息:
afterwards,there will be a following prompt message:
You are about to install the SDK to "/opt/fsl-imx-x11/3.14.52-1.1.0". Proceed[Y/n]? 这时输入“Y”并按“回车(Enter)”键表示确认。
then enter“Y”and press“Enter”key for confirmation。
5)等待安装完成
wait untill installation is completed
提示:安装过程大概需要几分钟的时间。 tips:installation will take a few minutes。
6) 检查安装
check installation
查看交叉编译工具链的版本信息以验证交叉编译工具链安装正常。
check the version information of cross compiler tool chain to verify the normality of installation
$ source /opt/fsl-imx-x11/3.14.52-1.1.0/environment-setup-cortexa9hf-vfp-neon-poky-linux-gnueabi
$ qmake -v
执行命令后会也出现类似如下的信息:
after execution of command,there will be following message:

= U-Boot编译(U-Boot compilation) =
准备编译(prepare compilation)
复制源码包到开发主机中(copy source code package to development host)
将下载的“u-boot源码”复制到Linux开发主机的“~/my-imx6/02_source”。
copy“u-boot source code”downloaded to “~/my-imx6/02_source”of Linux development host。
这一步自己采取相应的方式完成。
complete this step by yourself in a proper way。
解压u-boot源码包(decompress u-boot source code package)
$ cd ~/my-imx6/02_source/
$ tar xf u-boot-2015.04.tar.xz

编译(compilation)
使编译配置文件生效(validate compiler configuration file)
$ source ~/my-imx6/03_tools/gcc-linaro-arm-linux-gnueabihf-492-env

进入u-boot源码目录(enter u-boot source code directory)
$ cd ~/my-imx6/02_source/u-boot-2015.04

清除u-boot临时文件 (remove u-boot temporary files)
$ make distclean

配置u-boot(configure u-boot)
- 评估板及对应的 u-boot 编译配置:
configuration of development and its corresponding compiler:
评估板主型号
(development board main model)CPU类型-内存容量
(CPU type-memory capacity )处理器架构
(architeture of processor)对应的u-boot配置
(corresponding u-boot configuration)MY-IMX6-EK200 <thead>
i.MX 6QuadPlus - 1G Cortex-A9 myimx6ek200-6qp_config i.MX 6QuadPlus - 2G Cortex-A9 myimx6ek200-6qp-2g_config - i.MX6 Quad - 1G Cortex-A9 myimx6ek200-6q_config - i.MX6 Quad - 2G Cortex-A9 myimx6ek200-6q-2g_config - i.MX6 DualLite - 1G Cortex-A9 myimx6ek200-6u_config - i.MX 6Solo - 512M Cortex-A9 myimx6ek200-6s_config - i.MX 6Solo - 1G Cortex-A9 myimx6ek200-6s-1g_config - rowspan=5 MY-IMX6-EK314 i.MX 6QuadPlus - 1G Cortex-A9 myimx6ek200-6qp_config - i.MX 6QuadPlus - 2G Cortex-A9 myimx6ek200-6qp-2g_config - i.MX6 Quad- 1G Cortex-A9 myimx6ek314-6q_config - i.MX6 Quad- 2G Cortex-A9 myimx6ek314-6q-2g_config - i.MX6 DualLite - 1G Cortex-A9 myimx6ek314-6u_config - rowspan=4 MY-IMX6-EK336 i.MX 6QuadPlus - 1G Cortex-A9 myimx6ek336-6qp_config - i.MX 6QuadPlus - 2G Cortex-A9 myimx6ek336-6qp-2g_config - i.MX6 Quad- 1G Cortex-A9 myimx6ek336-6q_config - i.MX6 Quad- 2G Cortex-A9 myimx6ek336-6q-2g_config - rowspan=2 MY-IMX6-EK140 i.MX 6UltraLite-256M Cortex-A7 myimx6ek140-6g_config - i.MX 6UltraLite-512M Cortex-A7 myimx6ek140-6g-512m_config } - MYIMX6EK200-6Q-1G配置示例:
MYIMX6EK200-6Q-1G configuration example:
$ make myimx6ek200-6q_config
执行编译(execute compilation)
$ make
提示:这里为了提高编译速度,在make后面加了“-j4”。这里编译的Linux主机是双核4线程的,所以“-j”后面用了4,也就是采用4线程编译。“-j”后面的数字可以根据系统资源分配,但是不应该超过编译主机最大支持的线程数。
Tips:To speed up the compilation,add "-j4" after make.The Linux host used to compile is dual-core ,4 threads .So "-j" is followed by 4, which takes 4 threads to compile. The number behind "-j" is allocated based on system resources,but It should not exceed the maximum threads the host support.
- 编译完成
complete compilation
提示:u-boot编译过程大概需要一、两分钟时间。
Tips: u-boot compiling process may take one or two minutes。
目标文件(target file)
- 编译文件
compile file
编译完成后通过ls命令即可看到编译得到的文件u-boot.imx
you can get the compiled file u-boot .imx with ls command after compilation.
$ ls

- 目标文件
target file
MY-IMX6系列评估板的u-boot配置对应的目标文件名见下表:
The corresponding target file name for u-boot configuration of MY-IMX6 series evaluation board is shown in the table below:
u-boot配置
(u-boot configuration)目标文件
(target file)<thead>
myimx6ek200-6qp_config uboot-myimx6ek200-6qp.imx myimx6ek200-6qp-2g_config uboot-myimx6ek200-6qp-2g.imx - myimx6ek200-6q_config uboot-myimx6ek200-6q.imx - myimx6ek200-6q-2g_config uboot-myimx6ek200-6q-2g.imx - myimx6ek200-6u_config uboot-myimx6ek200-6u.imx - myimx6ek200-6s_config uboot-myimx6ek200-6s.imx - myimx6ek200-6s-1g_config uboot-myimx6ek200-6s-1g.imx - colspan=2 - myimx6ek314-6qp_config uboot-myimx6ek314-6qp.imx - myimx6ek314-6qp-2g_config uboot-myimx6ek314-6qp-2g.imx - myimx6ek314-6q_config uboot-myimx6ek314-6q.imx - myimx6ek314-6q-2g_config uboot-myimx6ek314-6q-2g.imx - myimx6ek314-6u_config uboot-myimx6ek314-6u.imx - colspan=2 - myimx6ek336-6qp_config uboot-myimx6ek336-6qp.imx - myimx6ek336-6qp-2g_config uboot-myimx6ek336-6qp-2g.imx - myimx6ek336-6q_config uboot-myimx6ek336-6q.imx - myimx6ek336-6q-2g_config uboot-myimx6ek336-6q-2g.imx - colspan=2 - myimx6ek140-6g_config uboot-myimx6ek140-6g.imx - myimx6ek140-6g-512m_config uboot-myimx6ek140-6g-512m.imx } 我们需要将编译得到的u-boot.imx复制为我们的目标文件名。
We need to copy the compilied file u-boot.imx as our target file name.:
这里以MY-IMX6-EK200-6Q为例(把配置myimx6ek200-6q_config编译生成的u-boot.imx复制为目标文件):
Copy the generated file u-boot.imx from the compilation of myimx6ek200-6q_config as target file.):
$ cp u-boot.imx ~/my-imx6/04_image/image-linux-31452/uboot-myimx6ek200-6q.imx

= 编译内核(compile kernel) =
准备编译(prepare compilation)
复制源码包到开发主机中(copy source code package to development host)
将下载的“linux源码”复制到Linux开发主机的“~/my-imx6/02_source”。
copy “linux source code”downloaded to “~/my-imx6/02_source”of Linux development host。
这一步自己采取相应的方式完成。
complete this step by yourself in a proper way。
解压linux源码包(decompress linux source code package)
$ cd ~/my-imx6/02_source/
$ tar xf linux-3.14.52.tar.xz

内核编译配置(kernel compilation configuration)
使编译配置文件生效(validate compilfer configuration file)
$ source ~/my-imx6/03_tools/gcc-linaro-arm-linux-gnueabihf-492-env

清除内核临时文件(remove kernel temporary file)
- 进入linux源码目录
enter linux source code directory
$ cd ~/my-imx6/02_source/linux-3.14.52

- 清除临时文件
remove temporary file
$ make distclean

内核配置(kernel configuration)
- 内核配置文件
kernel configuration file
评估板型号
(evaluation board model)配置文件
(configuration file)MY-IMX6-EK200 myimx6_defconfig MY-IMX6-EK314 MY-IMX6-EK336 MY-IMX6-EK140 myimx6ul_defconfig $ make myimx6_defconfig
如果是编译 MY-IMX6-EK140 的内核,请使用 $ make myimx6ul_defconfig
if what compified is kernel of MY-IMX6-EK140,please use $ make myimx6ul_defconfig
这里以 myimx6_defconfig 为例。
take myimx6_defconfig as an example。

编译内核(compife kernel)
- 执行编译
execute compilation
$ make zImage
- 编译完成
complete compilation
- 目标文件
target file
arch/arm/boot/zImage即为编译得到的内核文件,使用ls命令可查看文件信息。
arch/arm/boot/zImage is the kernel file compifed,you can check file information with ls command。
$ ls arch/arm/boot/zImage -la

注意:我们烧录及启动的内核文件名为“zImage-myimx6”,所以我们需要把zImage复制为zImage-myimx6。
Note: The kernel file name which is going to be programed and started is “zImage-myimx6”, So we should Copy zImage as zImage-myimx6
$ cp arch/arm/boot/zImage ~/my-imx6/04_image/image-linux-31452/zImage-myimx6

编译设备树(compife device tree)
评估板型号规格与设备树文件对应关系见下表:
The correspondence between the type of evaluation board and device tree is shown below:
评估板主型号
(development main model)CPU类型-内存容量
(CPU type-memory capacity)对应的设备树文件
(corresponding device tree file)MY-IMX6-EK200 <thead>
i.MX 6QuadPlus - 1G myimx6ek200-6qp.dtb i.MX 6QuadPlus - 2G myimx6ek200-6qp-2g.dtb - i.MX6 Quad - 1G myimx6ek200-6q.dtb - i.MX6 Quad - 2G myimx6ek200-6q-2g.dtb - i.MX6 DualLite - 1G myimx6ek200-6u.dtb - i.MX 6Solo - 512M myimx6ek200-6s.dtb - i.MX 6Solo - 1G myimx6ek200-6s-1g.dtb - rowspan=5 MY-IMX6-EK314 i.MX 6QuadPlus - 1G myimx6ek314-6qp.dtb - i.MX 6QuadPlus - 2G myimx6ek314-6qp-2g.dtb - i.MX6 Quad - 1G myimx6ek314-6q.dtb - i.MX6 Quad - 2G myimx6ek314-6q-2g.dtb - i.MX6 DualLite - 1G myimx6ek314-6u.dtb - rowspan=4 MY-IMX6-EK336 i.MX 6QuadPlus - 1G myimx6ek336-6qp.dtb - i.MX 6QuadPlus - 2G myimx6ek336-6qp-2g.dtb - i.MX6 Quad - 1G myimx6ek336-6q.dtb - i.MX6 Quad - 2G myimx6ek336-6q-2g.dtb - rowspan=2 MY-IMX6-EK140 i.MX 6UltraLite-256M myimx6ek140-6g.dtb - i.MX 6UltraLite-512M myimx6ek140-6g-512m.dtb } - 以MY-IMX6-EK200-6Q-1G为例
take MY-IMX6-EK200-6Q-1G as example
$ make myimx6ek200-6q.dtb

目标文件
target file
使用ls命令可查看编译得到的目标设备树文件信息:
You can browse the target device tree file information from compilation with ls command:
$ ls arch/arm/boot/dts/myimx6ek.dtb

复制设备树文件到镜像目录
Copy device tree file to image directory
$ cp arch/arm/boot/dts/myimx6ek*.dtb ~/my-imx6/04_image/image-linux-31452/

编译模块 (compife module)
- 编译模块命令
compile module command
$ make modules

- 安装模块到指定目录
Install module to the specified directory
$ make modules_install INSTALL_MOD_PATH=./modules

- 打包模块文件
package the module file
$ cd modules
$ tar cjf ../modules.tar.bz2 *

- 复制模块包到镜像目录
Copy module package to image directory
评估板型号
(development board model)目标模块包
(target module package)<thead>
MY-IMX6-EK200 rowspan=3 kernel-modules-myimx6.tar.bz2 MY-IMX6-EK314 - MY-IMX6-EK336 - MY-IMX6-EK140 kernel-modules-myimx6g.tar.bz2 } $ cp ../modules.tar.bz2 ~/my-imx6/04_image/image-linux-31452/kernel-modules-myimx6.tar.bz2
注意:如果是编译内核时配置文件使用的是 myimx6_defconfig,在这里要把 modules.tar.bz2 复制为 kernel-modules-myimx6.tar.bz2;如果是编译内核时配置文件使用的是 myimx6ul_defconfig,在这里要把 modules.tar.bz2 复制为 kernel-modules-myimx6g.tar.bz2
Note:when you compile the Kernel If the configuration file you use is myimx6_defconfig, here you should Copy modules.tar.bz2 as kernel-modules-myimx6.tar.bz2.If the configuration file is myimx6ul_defconfig,you should Copy modules.tar.bz2 as kernel-modules-myimx6g.tar.bz2.
= 应用程序编译(application compilation) =
Linux应用程序编译(Linux application compilation)
编写应用程序(write an application)
- 创建应用程序的源码目录和Linux-3.14.52的可执行程序目录
Create application source code directory and Linux-3.14.52 executable program directory
$ mkdir ~/my-demo/source_code -p

$ mkdir ~/my-demo/bin-l31452 -p

- 编写源代码
write source code
$ cd ~/my-demo/source_code
$ vi hello.c
写入以下代码并保存
write following code and save
#include <stdio.h>
int main(int argc, char **argv)
{
printf("Hello, MYZR!\n");
return;
}
- 查看代码
view code
$ cat hello.c
编译应用程序(compife application)
- 配置环境变量
Configure environment variables
$ source ~/my-imx6/03_tools/gcc-linaro-arm-linux-gnueabihf-492-env

- 编译
compife
$ ${CROSS_COMPILE}gcc hello.c -o hello.out

注意:上面的命令有包含“$”号,即“${CROSS_COMPILE}gcc”,是引用我们source时产生的环境变量。
Note:The above command contains “$”,which is “${CROSS_COMPILE}gcc”. It is the environment variable generated when referring to our source.。 - 目标文件
target file
$ file hello.out

可以看到目标文件 hello.out 的属性。
you can see the property of target file hello.out。
保存目标可执行文件(save target executable file)
$ mv hello.out ~/my-demo/bin-l31452/

QT应用程序编译 (QT application compife)
准备QT5程序代码(prepare QT5 program code)
提示:这里我们使用“Qt5_NMap_CarouselDemo_1.0.tgz”进行演示。
Tips:Here We demonstrate with “Qt5_NMap_CarouselDemo_1.0.tgz".
1)将代码包复制到Linux开发主机
copy code package to Linux development host
将代码包“Qt5_NMap_CarouselDemo_1.0.tgz”复制到“~/my-demo/source_code”。
copy code package“Qt5_NMap_CarouselDemo_1.0.tgz”to“~/my-demo/source_code”。
这一步自己采取相应的操作完成。
complete this step by yourself in a proper way。
2)解压代码包
decompress code package
$ cd ~/my-demo/source_code
$ tar zxf Qt5_NMap_CarouselDemo_1.0.tgz

编译QT5程序(compile QT5 application)
提示:我们将使用命令行编译。
Tips: We compile with commands。
1)进入代码目录
enter code directory
提示:我们前面将代码包“Qt5_NMap_CarouselDemo_1.0.tgz”解压在“~/my-demo/source_code”。
tips:first we decompress code package“Qt5_NMap_CarouselDemo_1.0.tgz”to“~/my-demo/source_code”。
$ cd ~/my-demo/source_code/Qt5_NMap_CarouselDemo_1.0/
2)检查QMake
check QMake
$ qmake –v

如果执行命令后当前终端有输出“QMake version 3.0”,则表示交叉编译工具配置正常。 If the current terminal output has “QMake version 3.0” after the execution of command,that means cross compiler is Configured normally..
否则需要执行下面的命令:
Otherwise you need to execute the command below:
$ source /opt/fsl-imx-x11/3.14.52-1.1.0/environment-setup-cortexa9hf-vfp-neon-poky-linux-gnueabi
3)生成Makefile文件
creat Makefile
$ qmake

执行qmake后通过ls可以看到多了Makefile文件
you can see an extra Makefile with ls after execution of qmake
4)编译
compile
$ make
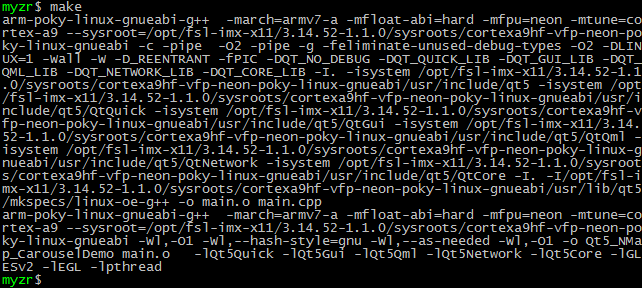
5)目标文件
target file
- 可执行文件
target file
$ file Qt5_NMap_CarouselDemo

- 资源文件
source file
QT5程序的运行需要对应的qml文件和content
Running QT5 needs the corresponding qml file and content

保存目标可执行文件(save target executable file)
由于QT5程序的运行需要对应的qml文件和content文件,这里我们为了操作的简洁,直接将整个目录复制到目标目录
Because running QT5 program requires qml file and content file, here We copy the entire directory to the target directory for simplicity.
$ cp ../Qt5_NMap_CarouselDemo_1.0 ~/my-demo/bin-l31452/ -a

应用程序打包(package application)
说明(instruction)
烧录工具支持烧录“my-demo.tar.xz”的文件包到评估板。所以在这里我们把我们需要的应用程序打包为“my-demo.tar.xz”。至于“my-demo.tar.xz”会被烧录到哪个位置,请看《烧录手册》。
Programming tool supports to program “my-demo.tar.xz” file package to evaluation board.So We package applications We need as “my-demo.tar.xz”.while where “my-demo.tar.xz” will be programmed ,refer to 《burning manual》。
打包应用程序(package application)
1)打包
package
这里我们将整个my-demo目录打包。
Here We package the whole my-demo directory。
$ cd ~
$ tar cjf my-demo.tar.bz2 my-demo

2)复制应用程序包为目标烧录文件
Copy application package as target programming file
$ cp my-demo.tar.bz2 ~/my-imx6/04_image/image-linux-31452/

= 目标烧录文件(target programming file) =
至此,我们在“~/my-imx6/04_image/image-linux-31452/”得到了除文件系统以外的一套烧录文件。包括“uboot.imx”、“myimx6.dtb”、“zImage-myimx6”、“kernel-modules.tar.bz2”、“my-demo.tar.bz2”。
So far,we get a set of programming file except file system from“~/my-imx6/04_image/image-linux-31452/”。including“uboot.imx”、“myimx6.dtb”、“zImage-myimx6”、“kernel-modules.tar.bz2”、“my-demo.tar.bz2”。
现在可以参照《烧录手册》烧录我们自己编译出来的image了。
Now we can program the image we compiled by ourselves referring to programming manual.
在评估板上运行应用程序 (run application on the evaluation board)
烧录系统之后,对评估板重新上电,登录系统后并执行以下命令。
After the burning, supply power for evaluation board,login system and execute commands below.
/home/root/my-demo/bin-l31452/hello.out
export DISPLAY=:0
/home/root/my-demo/bin-l31452/Qt5_NMap_CarouselDemo_1.0/Qt5_NMap_CarouselDemo
附:文件系统编译(Appendix:file system compilation)
注意及说明:
notes and instructions:
1)原始编译的过程中的下载量会超过4G。(提示:可以使用我们下载好的一些文件,以减少下载量,节约时间,在7.4中会说到)。
The download of the original compilation exceed 4G。(tips:you can use files we have downloaded in order to reduce downloads and save time,which is going to be mentioned in 7.4)。
2)编译主机的网络连接最好使用能访问www.fackbook.com 的网络,不然可能会受到境内防火墙的限制而无法下载编译需要的软件包。
The network of the compilation host is good to access to www.fackbook.com .Otherwise It may be subject to the condition of the domestic firewall and It is unable to download the software for compilation.
3)初次编译需要的时间根据网络状态及编译主机的配置需要2小时到无限时间(经粗略统计除去下载时间,在16核CPU、16G内存的主机上编译QT5系统用了大约100分钟。)
The initial compilation may take 2 hours to unlimited time.It depends on the network state and the configuration of the host.(After a rough statistics, It took about 100 minutes to compile QT5 system on the 16-core CPU 16 G memory host except download time。)
客户请根据实际情况决定是否自行编译文件系统或使用我们提供的文件系统。如果我们提供的文件系统能够满足需求,建议不要自行编译,因为编译过程可能会出现很多错误。
Customer may decide whether to compile the file system or use the file system We provide based on the actual situation. If the file system we provide meets the requirements, you had better not to compile by yourself. Since It may be a lot of errors during compilation.
准备编译 (Prepare for compilation)
安装软件包(install software package)
说明,Yocto编译依赖一些软件包,所以需要在开发主机上进行安装。
instruction,Yocto compilation relies on some software package. So you need to Install them on the host。
$ sudo apt-get install gawk wget git-core diffstat unzip texinfo \
gcc-multilib build-essential chrpath socat
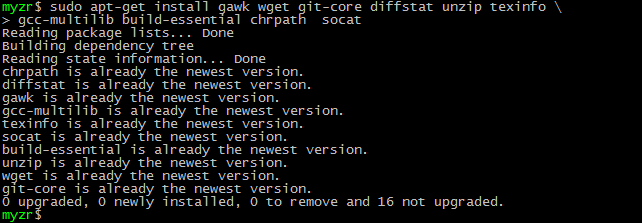
$ sudo apt-get install libsdl1.2-dev xterm sed cvs subversion \
coreutils texi2html docbook-utils python-pysqlite2 help2man make gcc \
g++ desktop-file-utils libgl1-mesa-dev libglu1-mesa-dev mercurial \
autoconf automake groff curl lzop asciidoc
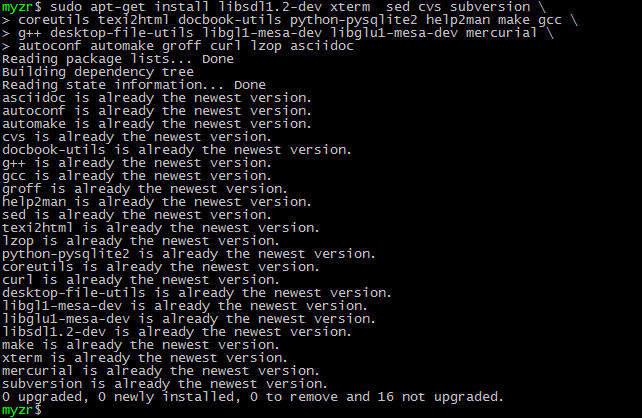
$ sudo apt-get install uboot-mkimage

准备源码(prepare source code)
1)下载源码
download source code
在网盘中下载 yocto__imx-3.14.52-1.1.0_ga.tar.xz
from network disk download yocto__imx-3.14.52-1.1.0_ga.tar.xz
2)创建工作目录
create working directory
$ mkdir ~/yocto

3)将源码包复制到工作目录
Copy source code package to working directory
复制“yocto__imx-3.14.52-1.1.0_ga.tar.xz”到“~/my-imx6/02_source”。
copy“yocto__imx-3.14.52-1.1.0_ga.tar.xz”to“~/my-imx6/02_source”。
这一步骤自己采取相应的方式进行
complete this step by yourself in a proper way
4) 解压源码包
decompress source code package
$ cd ~/yocto/
$ tar xf yocto__imx-3.14.52-1.1.0_ga.tar.xz

准备编译需要的软件包(Prepare software package required for compilation)
提示1:如果自己网络状况好且能访问境外网站,可以跳过这一节内容。
tips1:If you have a good network and can access a foreign website ,you can skip this section.
提示2:如果是使用我们下载好的一些包,请继续往下。
tips2:If you use the package we have downloaded, please go on to the next step.
提示3:限于网络上传速度的影响及软件包的更新,我们下载的软件包目录中可能不包括
编译需要的全部软件包,但是编译中缺少的软件包编译程序会在编译过程中自行下载。
tips3:As a result of the upload speed and the update of software package , the software package directory we downloaded may not include all the required software packages for compilation.But the compiler package that is missing from compilation will be downloaded on its own during compilation process.
1)下载软件包
download software package
在网盘中下载downloads文件夹(目前该文件夹大小在6 ~ 8G)。
download downloads folder on the network disk(currently, the folder size is 6~8G)。
2)将软件包复制到BSP目录
copy software package to BSP directory
将downloads移动到 “~/yocto/imx-3.14.52-1.1.0_ga” 目录
move downloads to “~/yocto/imx-3.14.52-1.1.0_ga” directory
这一步自己采取相应的方法完成。
complete this step by yourself in a proper way。
编译 (compilation)
更新BSP(update BSP)
$ cd ~/yocto/imx-3.14.52-1.1.0_ga/

$ ./bin/repo sync
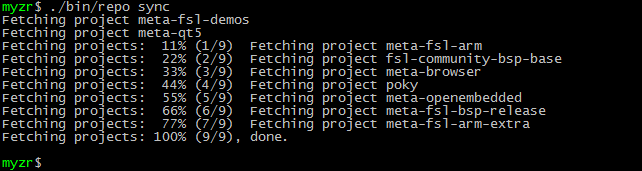
编译配置(compilation configuration)
$ DISTRO=fsl-imx-x11 MACHINE=imx6qsabresd source fsl-setup-release.sh -b build-x11

执行命令后终端会接收到输出的信息,一直按“空格”,在最后的对话中输入y
After executing the command,the terminal will receive the output message, keep pressing "space" ,enter "y" in the final dialog

示例:Do you accept the EULA you just read? (y/n) y
example:Do you accept the EULA you just read? (y/n) y
编译QT5文件系统(compife QT5文 file system)
1)执行编译命令
execute compilation command
$ bitbake fsl-image-qt5
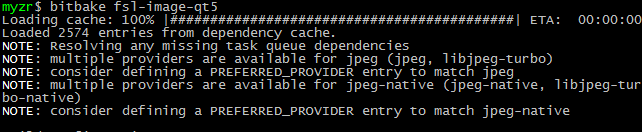
提示:整个编译过程除去下载时间,在16核CPU、16G内存的主机上需要1小时左右。
Tips: It takes about one hour to compile on the 16-core CPU and 16G memory host to complete the compilation process except download time.
2)目标文件
target file
$ ls ./tmp/deploy/images/imx6qsabresd/fsl-image-qt5-imx6qsabresd.tar.bz2

3)复制目标文件
copy target file
我们烧录的QT5系统文件名为“distro-fsl-image-qt5.tar.bz2”,所以需要将编译的文件系统复制为“distro-fsl-image-qt5.tar.bz2”。
The QT5 file system name we programmed is “distro-fsl-image-qt5.tar.bz2”, So we need to copy the compiled file as “distro-fsl-image-qt5.tar.bz2”。
$ cp ./tmp/deploy/images/imx6qsabresd/fsl-image-qt5-imx6qsabresd.tar.bz2 ~/my-imx6/04_image/image-linux-31452/distro-fsl-image-qt5.tar.bz2

编译Linux文件系统(compile Linux file system)
1)执行编译命令
execute compile command
$ bitbake fsl-image-machine-test
2)目标文件
target file
$ ls ./tmp/deploy/images/imx6qsabresd/fsl-image-machine-test-imx6qsabresd.tar.bz2

3)复制目标文件
copy target file
我们烧录的QT5系统文件名为“distro-fsl-image.tar.bz2”,所以需要将编译的文件系统复制为“distro-fsl-image.tar.bz2”。
The QT5 file system name We programmed is “distro-fsl-image.tar.bz2”, So we need to copy the compiled file as “distro-fsl-image.tar.bz2”
$ cp ./tmp/deploy/images/imx6qsabresd/fsl-image-machine-test-imx6qsabresd.tar.bz2 ~/my-imx6/04_image/image-linux-31452/distro-fsl-image.tar.bz2

编译QT5的交叉编译工具(compile the cross-compiler tool for QT5)
如果不需要自定义QT5交叉编译工具,则跳过本小节。
If you do not need to customize QT5 cross-compiler tool ,skip this section。
1)执行编译命令
execute compilation command
$ bitbake meta-toolchain-qt5
2)目标文件
target file
在“./tmp/deploy/sdk/”目录下可以找到我们编译生成的目标文件。

3)保存目标文件
save target file
将编译得到的“fsl-imx-x11-glibc-x86_64-meta-toolchain-qt5-cortexa9hf-vfp-neon-toolchain-3.14.52-1.1.0.sh”复制到“~/my-imx6/03_tools/”
copy“fsl-imx-x11-glibc-x86_64-meta-toolchain-qt5-cortexa9hf-vfp-neon-toolchain-3.14.52-1.1.0.sh”we compiled to“~/my-imx6/03_tools/”
4)安装QT5交叉编译工具
Install QT5 cross-compiler tool
如果需要使用自己编译的QT5交叉编译工具,需要先删除已经安装的QT5交叉编译工具。并参照前面“安装配置交叉编译工具链”中的“安装QT5交叉编译工具”进行安装。
if you need to use QT5 cross-compiler tool compiled by yourself, you have to remove QT5 cross-compiler tool which has been already Installed. Install it referring to the "Install QT5 cross-compile tool" of "Install and Configure cross-compile tool chain。
- 创建应用程序的源码目录和Linux-3.14.52的可执行程序目录
- 进入linux源码目录
- 评估板及对应的 u-boot 编译配置:


