“MY-IMX6 Linux-3.0.35 Build Manual”的版本间的差异
(创建页面,内容为“<div> = '''Prepare source code pacakge'''= ---- == '''3.0.35 Version code'''== === u-boot Source code === Filename:u-boot-2009.08--svn*.tar.xz<br> === kernel Sour...”) |
(没有差异)
|
2018年7月23日 (一) 17:38的最新版本
目录
Prepare source code pacakge
3.0.35 Version code
u-boot Source code
Filename:u-boot-2009.08--svn*.tar.xz
kernel Source code
Filename:linux-3.0.35--svn*.tar.xz
Cross compilation tool
Filename:gcc-4.6.2-glibc-2.13-linaro-multilib-2011.12.tar.bz2
Configuration compilation environment
Prepare source code
Prepare source code package
1)Create working directory
- Create ~/my-imx6 as working directory
- Create ~/my-imx6/02_source/imx_3.0.35_4.1.0 as source code directory.
$ mkdir ~/my-imx6/02_source/imx_3.0.35_4.1.0 -p
![]()
- Create ~/my-imx6/03_tools as tool directory
2)Copy source code package to the development host
Do it in this step in your own way.
Tip:this step is to copy “02_source code”from network disk to “~/my-imx6/02_source/imx_3.0.35_4.1.0”in development host,and copy “03_tool/toolchain”to “~/my-imx6/03_tools”.in development host.
Decompress source code package
1)Decompress u-boot source code and kernel source code.
$ cd ~/my-imx6/02_source/imx_3.0.35_4.1.0
$ tar xf u-boot-2009.08--svn*.tar.xz
$ tar xf linux-3.0.35--svn*.tar.xz

2)Decompress cross compiler tool
$ cd ~/my-imx6/03_tools/
$ tar jxf gcc-4.6.2-glibc-2.13-linaro-multilib-2011.12.tar.bz2
![]()
Development environment configuration
Install package needed
1)List of updated source
$ sudo apt-get update

After update,it will look like below:
2)Install aptitude package management tool and ia32-lib.
Tips:if Linux of compiler host is 32bit,you can skip this step.
- Install aptitude package management tool.

$ sudo apt-get –y install aptitude
- Install ia32-libs with aptitude.
$ sudo aptitude –y install ia32-libs
Tips:following is the screenshots with re-execution of installation command after installation of aptitude and ia32-libs is finished.

3)Install mkimage tool
$ sudo apt-get -y install uboot-mkimage
Tips:following is the screenshots with re-execution of installation command after installation of mkimage tool is finished.

4)Install ncurses-dev
Instruction:make menuconfig is dependent on it.
$ sudo aptitude -y install ncurses-dev
Tips:following is the screenshots with re-execution of installation command after installation of ncurses-dev tool is finished.

Configure environment variables of MY-IMX6 compilation
1)Write platform information to a new configured file.
$ echo "export ARCH=arm" > ~/my-imx6/03_tools/myimx6_3035_build_env
2)Write compiler tool chain path to configured file.
- Enter cross compiler tool directory
$ cd ~/my-imx6/03_tools/gcc-4.6.2-glibc-2.13-linaro-multilib-2011.12/fsl-linaro-toolchain/bin/
- Write path to configured file.
$ sed -i "\$a IMX6_GCC462_PATH=$PWD" ~/my-imx6/03_tools/myimx6_3035_build_env
- Write cross compiler tool to configured file
$ sed -i "\$a export CROSS_COMPILE=\$IMX6_GCC462_PATH/arm-none-linux-gnueabi-" ~/my-imx6/03_tools/myimx6_3035_build_env
3)View configured file
$ cat ~/my-imx6/03_tools/myimx6_3035_build_env
Note:If an error occurs in any step, need to delect ~/my-imx6/03_tools/myimx6_3035_build_env ,and operate again all steps of this segment.
Compile u-boot
Enter u-boot source code directory
$ cd ~/my-imx6/02_source/imx_3.0.35_4.1.0/u-boot-2009.08/
![]()
Validate configured file
- Execute source command
$ source ~/my-imx6/03_tools/myimx6_3035_build_env
![]()
- View compiler configuration
$ echo $ARCH
$ echo $CROSS_COMPILE
Tips:you can see that ARCH和CROSS_COMPILE is configured.

- Verify cross compiler tool configuration.
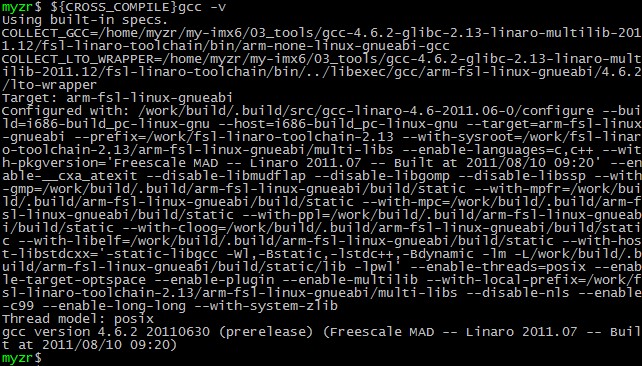
$${CROSS_COMPILE}gcc –v
Tips:you can see version information of cross compiler tool shown on terminal after execution of command.as below:

Remove u-boot configuration
u-boot Configuration
- Evaluation board and its corresponding u-boot compiler configuration:
| Evaluation board main model | CPU type-memory capacity | Corresponding u-boot configuration |
|---|---|---|
| MY-IMX6-EK200 | 6Q(quad. core)- 1G | myimx6ek200_6q_config |
| 6Q(quad core)- 2G | myimx6ek200_6q_2g_config | |
| 6U(dual core tile)- 1G | myimx6ek200_6u_config | |
| 6S(single core)- 512M | myimx6ek200_6s_config | |
| MY-IMX6-EK314 | 6Q(quad.core)- 1G | myimx6ek314_6q_config |
| 6Q(quad.core)- 2G | myimx6ek314_6q_2g_config | |
| 6U(dual core tile)- 1G | myimx6ek314_6u_config | |
| 6S(single core)- 512M | myimx6ek314_6s_config |
- MYIMX6EK200-6Qxx-1G configuration example:
Compilation
- Execute compilation
$ make
Tips:To speed up the compilation,add "-j4" after make.The Linux host used to compile is dual-core ,4 threads .So "-j" is followed by 4, which takes 4 threads to compile. The number behind "-j" is allocated based on system resources,but It should not exceed the maximum threads the host support.

- Complete compilation
Tips:u-boot compilation process will take a few minustes or so.

Target file
You can get the compiled file u-boot.bin with ls command after compilation.
$ ls

Compile kernel
Enter kernel source directory
$ cd ~/my-imx6/02_source/imx_3.0.35_4.1.0/linux-3.0.35/
![]()
Validate configured file
- Execute source command
$ source ~/my-imx6/03_tools/myimx6_3035_build_env
![]()
- View compiler configuration
$ echo $ARCH
$ echo $CROSS_COMPILE
Tips:you can see that ARCH和CROSS_COMPILE is configured

- Verify cross compiler tool configuration
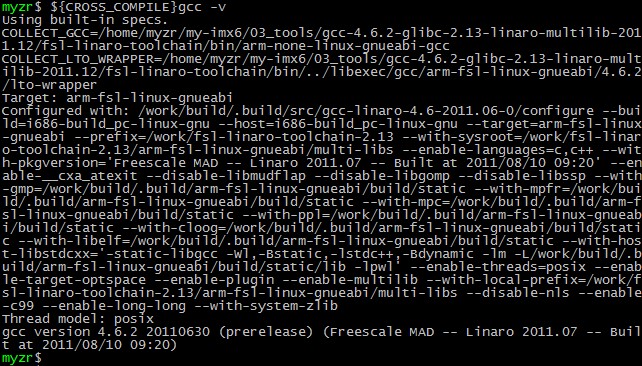
$ ${CROSS_COMPILE}gcc –v
Tips:you can see version information of cross compiler tool shown on terminal after execution of command.as below:

Prepare for kernel configuration
- Remove kernel configuration
- Generated.config file
Instructions:configuration files used for MY-IMX6-EK200 seires of evaluation board and MY-IMX6-EK314 series of evaluation board is myimx6_defconfig.
$ make myimx6_defconfig

Compile kernel
- Compile uImage
$ make uImage
Instruction:4 threads compilation is used in the screenshots.

- Complete compilation
- Target file
arch/arm/boot/uImage is the target file through compilation,you can view the file information with ls command.
$ ls arch/arm/boot/uImage –la
![]()
Compile module
- Compile
$ make
Instruction:4 threads compilation is used in the screenshots.

- Complete compilation
- Target file
The.ko file of each module is in the directory where code is located after compilation ,you can find the module compiled with find command after compilation,refering command as below:</span>
$ find -name *.ko

Linux application compilation
Write application
1) Create application directory
$ mkdir ~/my-imx6/02_source/application/ -p
$ cd ~/my-imx6/02_source/application/
![]()
2) Write application(here take hello.c as example)
Create hello.c and write following code and save:
- include <stdio.h>
int main(int argc, char **argv)
{
printf("Hello, MYZR!\n");
return;
}
Validate compiler configured file
- Execute source command
$ source ~/my-imx6/03_tools/myimx6_3035_build_env
![]()
- View compiler configuration
$ echo $ARCH
$ echo $CROSS_COMPILE
Tips:you can see that ARCH和CROSS_COMPILE is configured

- Verify cross compiler tool configuration
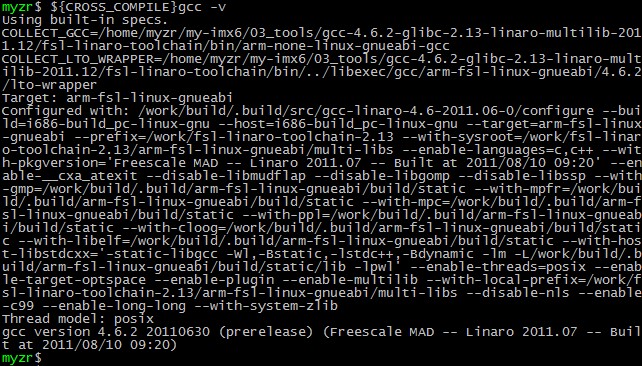
$ ${CROSS_COMPILE}gcc –v
Tips:you can see version information of cross compiler tool shown on terminal after execution of command.as below:

Compile application
2) Compile
$ ${CROSS_COMPILE}gcc hello.c -o hello.out
Note:the above commands contain charater“$”,e.g“${CROSS_COMPILE}gcc”,which is the environment variable generated when referring to our source.
![]()
3) View type of target file
$ file hello.out
You can get the property of target file hello.out.

File system
File system instruction
File system package is located in image file folder in the network disk。as to type of file system supported and way of download please refer to《MY-IMX6 buring guide》.
Decompress file system to compiler host
1)Create directory of file system and enter.
$ mkdir ~/my-imx6/04_rootfs/ -p
$ cd ~/my-imx6/04_rootfs/
![]()
2)Copy file system to ~/my-imx6/04_rootfs/directory
This step sbould be done in your own way
3)Decompress file system to specified directory
$ mkdir rootfs
$ sudo tar jxf rootfs-linux.tar.bz2 -C rootfs
![]()
Add application to file system
$ cp ~/my-imx6/02_source/application/hello.out rootfs/app_test/
![]()
5)Re-pakcage file system
$ rm -rf rootfs-linux.tar.bz2
$ cd rootfs/
$ sudo tar cjf ../rootfs-linux.tar.bz2 *

Add module to file system
Prepare .ko file of module needed,as to other operations please refer to“add application to file system”.


