| 评估板型号 |
支持的系统版本 |
u-boot源码文件 |
linux源码文件
|
<thead>
| MY-IMX6-EK200 |
|
rowspan=4 |
Linux-3.14.52 |
|
rowspan=4 |
u-boot-2015.04.tar.xz |
|
rowspan=4 |
linux-3.14.52.tar.xz |
</thead>
<tbody>
| MY-IMX6-EK314 |
|
|
|
|
|
|
|
|
|
| - |
|
|
|
|
|
|
|
|
|
| MY-IMX6-EK336 |
|
|
|
|
|
|
|
|
|
| - |
|
|
|
|
|
|
|
|
|
| MY-IMX6-EK140 |
|
|
|
|
|
|
|
|
|
| } |
|
|
|
|
|
|
|
|
|
</tbody>
交叉编译工具文件
交叉编译工具:fsl-imx-x11-glibc-x86_64-meta-toolchain-qt5-cortexa9hf-vfp-neon-toolchain-3.14.52-1.1.0.sh
创建工作目录
1)源码目录
$ mkdir ~/my-imx6/02_source –p

2)工具目录
$ mkdir ~/my-imx6/03_tools –p

3)镜像目录
$ mkdir ~/my-imx6/04_image –p

$ mkdir ~/my-imx6/04_image/image-linux-31452 –p

4)应用程序目录
$ mkdir ~/my-demo

安装交叉编译工具链
说明:安装后的 fsl-imx-x11-glibc-x86_64-meta-toolchain-qt5-cortexa9hf-vfp-neon-toolchain-3.14.52-1.1.0.sh 可以用来编译 u-boot、linux 内核、linux 应用程序、QT5应用程序。
安装步骤
1)进入交叉编译工具链目录
$ cd ~/my-imx6/03_tools/

2)执行安装命令
$ sh fsl-imx-x11-glibc-x86_64-meta-toolchain-qt5-cortexa9hf-vfp-neon-toolchain-3.14.52-1.1.0.sh
3)选择安装路径
执行安装命令后会出现如下提示信息:
Enter target directory for SDK (default: /opt/fsl-imx-x11/3.14.52-1.1.0):
这时按“回车(Enter)”键,我们保持默认的安装路径。
4)确认安装路径
之后,会提示如下信息:
You are about to install the SDK to "/opt/fsl-imx-x11/3.14.52-1.1.0". Proceed[Y/n]?
这时输入“Y”并按“回车(Enter)”键表示确认。

5)等待安装完成
提示:安装过程大概需要几分钟的时间。
检查安装
查看交叉编译工具链的版本信息以验证交叉编译工具链安装正常。
$ source /opt/fsl-imx-x11/3.14.52-1.1.0/environment-setup-cortexa9hf-vfp-neon-poky-linux-gnueabi
$ qmake -v
执行命令后会也出现类似如下的信息:

= U-Boot编译 =
准备编译
复制源码包到开发主机中
将下载的“u-boot源码”复制到Linux开发主机的“~/my-imx6/02_source”。
这一步自己采取相应的方式完成。
解压u-boot源码包
$ cd ~/my-imx6/02_source/
$ tar xf u-boot-2015.04.tar.xz

编译
使编译配置文件生效
$ source ~/my-imx6/03_tools/gcc-linaro-arm-linux-gnueabihf-492-env

进入u-boot源码目录
$ cd ~/my-imx6/02_source/u-boot-2015.04

清除u-boot临时文件
$ make distclean

配置u-boot
| 评估板主型号
|
CPU类型-内存容量
|
处理器架构
|
对应的u-boot配置
|
MY-IMX6-EK200
|
i.MX 6QuadPlus - 1G
|
Cortex-A9
<thead>
| myimx6ek200-6qp_config |
</thead>
<tbody>
|
</tbody>
|
i.MX 6QuadPlus - 2G
|
Cortex-A9
<thead>
| myimx6ek200-6qp-2g_config |
</thead>
<tbody>
|
</tbody>
|
i.MX6 Quad - 1G
|
Cortex-A9
<thead>
| myimx6ek200-6q_config |
</thead>
<tbody>
|
</tbody>
|
i.MX6 Quad - 2G
|
Cortex-A9
<thead>
| myimx6ek200-6q-2g_config |
</thead>
<tbody>
|
</tbody>
|
i.MX6 DualLite - 1G
|
Cortex-A9
<thead>
| myimx6ek200-6u_config |
</thead>
<tbody>
|
</tbody>
|
i.MX 6Solo - 512M
|
Cortex-A9
<thead>
| myimx6ek200-6s_config |
</thead>
<tbody>
|
</tbody>
|
i.MX 6Solo - 1G
|
Cortex-A9
<thead>
| myimx6ek200-6s-1g_config |
</thead>
<tbody>
| rowspan=5|MY-IMX6-EK314 |
| i.MX 6QuadPlus - 1G |
| Cortex-A9 |
| myimx6ek200-6qp_config |
| - |
</tbody>
|
i.MX 6QuadPlus - 2G
|
Cortex-A9
<thead>
| myimx6ek200-6qp-2g_config |
</thead>
<tbody>
|
</tbody>
|
i.MX6 Quad- 1G
|
Cortex-A9
<thead>
| myimx6ek314-6q_config |
</thead>
<tbody>
|
</tbody>
|
i.MX6 Quad- 2G
|
Cortex-A9
<thead>
| myimx6ek314-6q-2g_config |
</thead>
<tbody>
|
</tbody>
|
i.MX6 DualLite - 1G
|
Cortex-A9
<thead>
| myimx6ek314-6u_config |
</thead>
<tbody>
| rowspan=4|MY-IMX6-EKPOB |
| i.MX 6QuadPlus - 1G |
| Cortex-A9 |
| myimx6ekpob-6qp_config |
| - |
</tbody>
|
i.MX 6QuadPlus - 2G
|
Cortex-A9
<thead>
| myimx6ekpob-6qp-2g_config |
</thead>
<tbody>
|
</tbody>
|
i.MX6 Quad- 1G
|
Cortex-A9
<thead>
| myimx6ekpob-6q_config |
</thead>
<tbody>
|
</tbody>
|
i.MX6 Quad- 2G
|
Cortex-A9
<thead>
| myimx6ekpob-6q-2g_config |
</thead>
<tbody>
| rowspan=2|MY-IMX6-EK140 |
| i.MX 6UltraLite-256M |
| Cortex-A7 |
| myimx6ek140-6g_config |
| - |
</tbody>
|
i.MX 6UltraLite-512M
|
Cortex-A7
|
myimx6ek140-6g-512m_config
|
$ make myimx6ek200-6q_config

执行编译
$ make
提示:这里为了提高编译速度,在make后面加了“-j4”。这里编译的Linux主机是双核4线程的,所以“-j”后面用了4,也就是采用4线程编译。“-j”后面的数字可以根据系统资源分配,但是不应该超过编译主机最大支持的线程数。

提示:u-boot编译过程大概需要一、两分钟时间。

目标文件
编译完成后通过ls命令即可看到编译得到的文件u-boot.imx
$ ls

MY-IMX6系列评估板的u-boot配置对应的目标文件名见下表:
u-boot配置
|
目标文件
|
myimx6ek200-6qp_config
<thead>
| uboot-myimx6ek200-6qp.imx |
</thead>
<tbody>
| myimx6ek200-6qp-2g_config |
| uboot-myimx6ek200-6qp-2g.imx |
| - |
| myimx6ek200-6q_config |
| uboot-myimx6ek200-6q.imx |
| - |
| myimx6ek200-6q-2g_config |
| uboot-myimx6ek200-6q-2g.imx |
| - |
| myimx6ek200-6u_config |
| uboot-myimx6ek200-6u.imx |
| - |
| myimx6ek200-6s_config |
| uboot-myimx6ek200-6s.imx |
| - |
| myimx6ek200-6s-1g_config |
| uboot-myimx6ek200-6s-1g.imx |
| - |
| colspan=2 |
</tbody>
|
myimx6ek314-6qp_config
<thead>
| uboot-myimx6ek314-6qp.imx |
</thead>
<tbody>
| myimx6ek314-6qp-2g_config |
| uboot-myimx6ek314-6qp-2g.imx |
| - |
| myimx6ek314-6q_config |
| uboot-myimx6ek314-6q.imx |
| - |
| myimx6ek314-6q-2g_config |
| uboot-myimx6ek314-6q-2g.imx |
| - |
| myimx6ek314-6u_config |
| uboot-myimx6ek314-6u.imx |
| - |
| colspan=2 |
</tbody>
|
myimx6ekpob-6qp_config
<thead>
| uboot-myimx6ekpob-6qp.imx |
</thead>
<tbody>
| myimx6ekpob-6qp-2g_config |
| uboot-myimx6ekpob-6qp-2g.imx |
| - |
| myimx6ekpob-6q_config |
| uboot-myimx6ekpob-6q.imx |
| - |
| myimx6ekpob-6q-2g_config |
| uboot-myimx6ekpob-6q-2g.imx |
| - |
| colspan=2 |
</tbody>
|
myimx6ekpob-6g_config
|
uboot-myimx6ek140-6g.imx
|
| myimx6ekpob-6g-512m_config
|
uboot-myimx6ek140-6g-512m.imx
|
我们需要将编译得到的u-boot.imx复制为我们的目标文件名。
这里以MY-IMX6-EK200-6Q为例(把配置myimx6ek200-6q_config编译生成的u-boot.imx复制为目标文件):
$ cp u-boot.imx ~/my-imx6/04_image/image-linux-31452/uboot-myimx6ek200-6q.imx

= 编译内核 =
准备编译
复制源码包到开发主机中
将下载的“linux源码”复制到Linux开发主机的“~/my-imx6/02_source”。
这一步自己采取相应的方式完成。
解压linux源码包
$ cd ~/my-imx6/02_source/
$ tar xf linux-3.14.52.tar.xz

内核编译配置
使编译配置文件生效
$ source ~/my-imx6/03_tools/gcc-linaro-arm-linux-gnueabihf-492-env

清除内核临时文件
$ cd ~/my-imx6/02_source/linux-3.14.52

$ make distclean

内核配置
$ make myimx6_defconfig

编译内核
$ make zImage


arch/arm/boot/zImage即为编译得到的内核文件,使用ls命令可查看文件信息。
$ ls arch/arm/boot/zImage -la

注意:我们烧录及启动的内核文件名为“zImage-myimx6”,所以我们需要把zImage复制为zImage-myimx6。
$ cp arch/arm/boot/zImage ~/my-imx6/04_image/image-linux-31452/zImage-myimx6

编译设备树
评估板型号规格与设备树文件对应关系见下表:
评估板主型号
|
CPU类型-内存容量
|
对应的设备树文件
|
MY-IMX6-EK200
|
i.MX 6QuadPlus - 1G
<thead>
| myimx6ek200-6qp.dtb |
</thead>
<tbody>
|
</tbody>
|
i.MX 6QuadPlus - 2G
<thead>
| myimx6ek200-6qp-2g.dtb |
</thead>
<tbody>
|
</tbody>
|
i.MX6 Quad - 1G
<thead>
| myimx6ek200-6q.dtb |
</thead>
<tbody>
|
</tbody>
|
i.MX6 Quad - 2G
<thead>
| myimx6ek200-6q-2g.dtb |
</thead>
<tbody>
|
</tbody>
|
i.MX6 DualLite - 1G
<thead>
| myimx6ek200-6u.dtb |
</thead>
<tbody>
|
</tbody>
|
i.MX 6Solo - 512M
<thead>
| myimx6ek200-6s.dtb |
</thead>
<tbody>
|
</tbody>
|
i.MX 6Solo - 1G
<thead>
| myimx6ek200-6s-1g.dtb |
</thead>
<tbody>
| rowspan=5|MY-IMX6-EK314 |
| i.MX 6QuadPlus - 1G |
| myimx6ek314-6qp.dtb |
| - |
</tbody>
|
i.MX 6QuadPlus - 2G
<thead>
| myimx6ek314-6qp-2g.dtb |
</thead>
<tbody>
|
</tbody>
|
i.MX6 Quad - 1G
<thead>
| myimx6ek314-6q.dtb |
</thead>
<tbody>
|
</tbody>
|
i.MX6 Quad - 2G
<thead>
| myimx6ek314-6q-2g.dtb |
</thead>
<tbody>
|
</tbody>
|
i.MX6 DualLite - 1G
<thead>
| myimx6ek314-6u.dtb |
</thead>
<tbody>
| rowspan=4|MY-IMX6-EKPOB |
| i.MX 6QuadPlus - 1G |
| myimx6ekpob-6qp.dtb |
| - |
</tbody>
|
i.MX 6QuadPlus - 2G
<thead>
| myimx6ekpob-6qp-2g.dtb |
</thead>
<tbody>
|
</tbody>
|
i.MX6 Quad - 1G
<thead>
| myimx6ekpob-6q.dtb |
</thead>
<tbody>
|
</tbody>
|
i.MX6 Quad - 2G
<thead>
| myimx6ekpob-6q-2g.dtb |
</thead>
<tbody>
| rowspan=2|MY-IMX6-EK140 |
| i.MX 6UltraLite-256M |
| myimx6ek140-6g.dtb |
| - |
</tbody>
|
i.MX 6UltraLite-512M
|
myimx6ek140-6g-512m.dtb
|
以MY-IMX6-EK200-6Q-1G为例
$ make myimx6ek200-6q.dtb

使用ls命令可查看编译得到的目标设备树文件信息:
$ ls arch/arm/boot/dts/myimx6ek.dtb

复制设备树文件到镜像目录
$ cp arch/arm/boot/dts/myimx6ek*.dtb ~/my-imx6/04_image/image-linux-31452/

编译模块
$ make modules

$ make modules_install INSTALL_MOD_PATH=./modules

$ cd modules
$ tar cjf ../modules.tar.bz2 *

注意:这里把modules.tar.bz2复制为 kernel-modules.tar.bz2
$ cp ../modules.tar.bz2 ~/my-imx6/04_image/image-linux-31452/kernel-modules.tar.bz2

= 其他编译 =
WIFI模块编译
1)下载源码
在网盘中下载WIFI的源码包rtl8188EUS_linux_v4.3.0.9_15178.20150907.tar.xz,并将源码放到 ~/my-imx6/02_source目录。
2)解压源码
$ tar xf rtl8188EUS_linux_v4.3.0.9_15178.20150907.tar.xz

3)编译
$ cd rtl8188EUS_linux_v4.3.0.9_15178.20150907/
$ make

4)编译完成

5)将模块移动到内核的模块目录

6)重新打包模块
$ cd ~/my-imx6/02_source/linux-3.14.52/modules/
$ tar cjf ../modules.tar.bz2 *
$ cp ../modules.tar.bz2 ~/my-imx6/04_image/image-linux-31452/kernel-modules.tar.bz2

= 应用程序编译 =
Linux应用程序编译
编写应用程序
- 创建应用程序的源码目录和Linux-3.14.52的可执行程序目录
$ mkdir ~/my-demo/source_code -p

$ mkdir ~/my-demo/bin-l31452 -p

$ cd ~/my-demo/source_code
$ vi hello.c
写入以下代码并保存
#include <stdio.h>
int main(int argc, char **argv)
{
printf("Hello, MYZR!\n");
return;
}

$ cat hello.c
编译应用程序
$ source ~/my-imx6/03_tools/gcc-linaro-arm-linux-gnueabihf-492-env

$ ${CROSS_COMPILE}gcc hello.c -o hello.out

注意:上面的命令有包含“$”号,即“${CROSS_COMPILE}gcc”,是引用我们source时产生的环境变量。
$ file hello.out

可以看到目标文件 hello.out 的属性。
保存目标可执行文件
$ mv hello.out ~/my-demo/bin-l31452/

QT应用程序编译
准备QT5程序代码
提示:这里我们使用“Qt5_NMap_CarouselDemo_1.0.tgz”进行演示。
1)将代码包复制到Linux开发主机
将代码包“Qt5_NMap_CarouselDemo_1.0.tgz”复制到“~/my-demo/source_code”。
这一步自己采取相应的操作完成。
2)解压代码包
$ cd ~/my-demo/source_code
$ tar zxf Qt5_NMap_CarouselDemo_1.0.tgz

编译QT5程序
提示:我们将使用命令行编译。
1)打开一个新的字符终端
说明:QT5程序的编译会设置一些环境变量,为了避免影响到其它终端,我们使用一个新的字符终端。这样也避免出现不必要的错误。
2)进入代码目录
提示:我们前面将代码包“Qt5_NMap_CarouselDemo_1.0.tgz”解压在“~/my-demo/source_code”。
$ cd ~/my-demo/source_code/Qt5_NMap_CarouselDemo_1.0/
3)配置编译环境变量
$ source /opt/fsl-imx-x11/3.14.52-1.1.0/environment-setup-cortexa9hf-vfp-neon-poky-linux-gnueabi

4)检查QMake
$ qmake –v

5)生成Makefile文件
$ qmake

执行qmake后通过ls可以看到多了Makefile文件
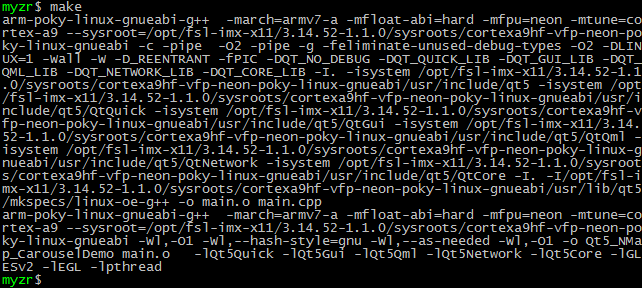
6)编译
$ make

7)目标文件
$ file Qt5_NMap_CarouselDemo

QT5程序的运行需要对应的qml文件和content

保存目标可执行文件
由于QT5程序的运行需要对应的qml文件和content文件,这里我们为了操作的简洁,直接将整个目录复制到目标目录
$ cp ../Qt5_NMap_CarouselDemo_1.0 ~/my-demo/bin-l31452/ -a

应用程序打包
说明
烧录工具支持烧录“my-demo.tar.xz”的文件包到评估板。所以在这里我们把我们需要的应用程序打包为“my-demo.tar.xz”。至于“my-demo.tar.xz”会被烧录到哪个位置,请看《烧录手册》。
打包应用程序
1)打包
这里我们将整个my-demo目录打包。
$ cd ~
$ tar cJf my-demo.tar.bz2 my-demo

2)复制应用程序包为目标烧录文件
$ cp my-demo.tar.bz2 ~/my-imx6/04_image/image-linux-31452/

= 目标烧录文件 =
至此,我们在“~/my-imx6/04_image/image-linux-31452/”得到了除文件系统以外的一套烧录文件。包括“uboot.imx”、“myimx6.dtb”、“zImage-myimx6”、“kernel-modules.tar.bz2”、“my-demo.tar.bz2”。
现在可以参照《烧录手册》烧录我们自己编译出来的image了。
在评估板上运行应用程序
烧录系统之后,对评估板重新上电,登录系统后并执行以下命令。
/home/root/my-demo/bin-l31452/hello.out
export DISPLAY=:0
/home/root/my-demo/bin-l31452/Qt5_NMap_CarouselDemo_1.0/Qt5_NMap_CarouselDemo
附:文件系统编译
注意及说明:
1)原始编译的过程中的下载量会超过4G。(提示:可以使用我们下载好的一些文件,以减少下载量,节约时间,在7.4中会说到)。
2)编译主机的网络连接最好使用能访问www.fackbook.com 的网络,不然可能会受到境内防火墙的限制而无法下载编译需要的软件包。
3)初次编译需要的时间根据网络状态及编译主机的配置需要2小时到无限时间(经粗略统计除去下载时间,在16核CPU、16G内存的主机上编译QT5系统用了大约100分钟。)
客户请根据实际情况决定是否自行编译文件系统或使用我们提供的文件系统。如果我们提供的文件系统能够满足需求,建议不要自行编译,因为编译过程可能会出现很多错误。
准备编译
安装软件包
说明,Yocto编译依赖一些软件包,所以需要在开发主机上进行安装。
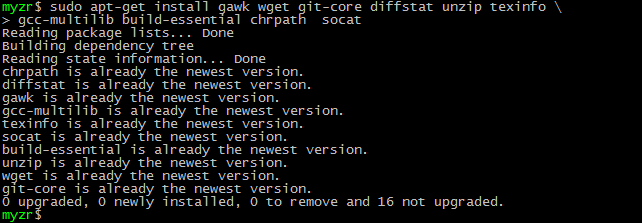
$ sudo apt-get install gawk wget git-core diffstat unzip texinfo \
gcc-multilib build-essential chrpath socat

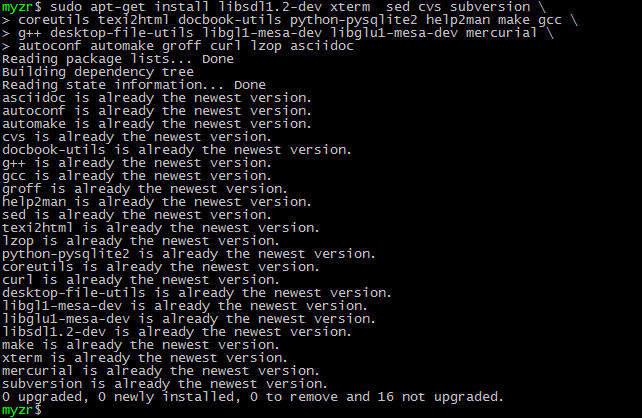
$ sudo apt-get install libsdl1.2-dev xterm sed cvs subversion \
coreutils texi2html docbook-utils python-pysqlite2 help2man make gcc \
g++ desktop-file-utils libgl1-mesa-dev libglu1-mesa-dev mercurial \
autoconf automake groff curl lzop asciidoc

$ sudo apt-get install uboot-mkimage

准备源码
1)下载源码
在网盘中下载 yocto__imx-3.14.52-1.1.0_ga.tar.xz
2)创建工作目录
$ mkdir ~/yocto

3)将源码包复制到工作目录
复制“yocto__imx-3.14.52-1.1.0_ga.tar.xz”到“~/my-imx6/02_source”。
这一步骤自己采取相应的方式进行
4) 解压源码包
$ cd ~/yocto/
$ tar xf yocto__imx-3.14.52-1.1.0_ga.tar.xz

准备编译需要的软件包
提示1:如果自己网络状况好且能访问境外网站,可以跳过这一节内容。
提示2:如果是使用我们下载好的一些包,请继续往下。
提示3:限于网络上传速度的影响及软件包的更新,我们下载的软件包目录中可能不包括
编译需要的全部软件包,但是编译中缺少的软件包编译程序会在编译过程中自行下载。
1)下载软件包
在网盘中下载downloads文件夹(目前该文件夹大小在6 ~ 8G)。
2)将软件包复制到BSP目录
将downloads移动到 “~/yocto/imx-3.14.52-1.1.0_ga” 目录
这一步自己采取相应的方法完成。
编译
更新BSP
$ cd ~/yocto/imx-3.14.52-1.1.0_ga/

$ ./bin/repo sync

编译配置
$ DISTRO=fsl-imx-x11 MACHINE=imx6qsabresd source fsl-setup-release.sh -b build-x11

执行命令后终端会接收到输出的信息,一直按“空格”,在最后的对话中输入y

示例:Do you accept the EULA you just read? (y/n) y
编译QT5文件系统
1)执行编译命令
$ bitbake fsl-image-qt5

提示:整个编译过程除去下载时间,在16核CPU、16G内存的主机上需要1小时左右。
2)目标文件
$ ls ./tmp/deploy/images/imx6qsabresd/fsl-image-qt5-imx6qsabresd.tar.bz2

3)复制目标文件
我们烧录的QT5系统文件名为“distro-fsl-image-qt5.tar.bz2”,所以需要将编译的文件系统复制为“distro-fsl-image-qt5.tar.bz2”。
$ cp ./tmp/deploy/images/imx6qsabresd/fsl-image-qt5-imx6qsabresd.tar.bz2 ~/my-imx6/04_image/image-linux-31452/distro-fsl-image-qt5.tar.bz2

编译Linux文件系统
1)执行编译命令
$ bitbake fsl-image-machine-test
2)目标文件
$ ls ./tmp/deploy/images/imx6qsabresd/fsl-image-machine-test-imx6qsabresd.tar.bz2

3)复制目标文件
我们烧录的QT5系统文件名为“distro-fsl-image.tar.bz2”,所以需要将编译的文件系统复制为“distro-fsl-image.tar.bz2”。
$ cp ./tmp/deploy/images/imx6qsabresd/fsl-image-machine-test-imx6qsabresd.tar.bz2 ~/my-imx6/04_image/image-linux-31452/distro-fsl-image.tar.bz2

编译QT5的交叉编译工具
如果不需要自定义QT5交叉编译工具,则跳过本小节。
1)执行编译命令
$ bitbake meta-toolchain-qt5
2)目标文件
在“./tmp/deploy/sdk/”目录下可以找到我们编译生成的目标文件。

3)保存目标文件
将编译得到的“fsl-imx-x11-glibc-x86_64-meta-toolchain-qt5-cortexa9hf-vfp-neon-toolchain-3.14.52-1.1.0.sh”复制到“~/my-imx6/03_tools/”
4)安装QT5交叉编译工具
如果需要使用自己编译的QT5交叉编译工具,需要先删除已经安装的QT5交叉编译工具。并参照前面“安装配置交叉编译工具链”中的“安装QT5交叉编译工具”进行安装。


