MY-IMX6 Linux-3.14.52 Build Manual
目录
- 1 Document instruction
- 2 Prepare source code and related files
- 3 Install cross-compilation tool chain
- 4 U-Boot compilation
- 5 Compile kernel
- 6 Application compilation
- 7 Target programming file
- 8 Appendix:file system compilation
Document instruction
System environment instruction
- CUP architeture of host used for compilation:64bit
- System of host:Linux
- Linux release version:Ubuntu
- Ubuntu version type:server version
- Ubuntu version no.:12.04.5
- Ubuntu system type:x86-64
Note: The development host should use ubuntu 12.04.5 x86-64(desktop and server version are available),Using other distribution of Linux and other versions of
Ubuntu may encounter unnecessary problems .
Operation Instruction
1)The line in the document which begins with “$”,which is followed by the Linux command..
2)All the Linux commands in the document are recommended to be entered into the host manually for execution.(Copying ,pasting to the host directly to execute may fail).
3)In all the Linux execution commands of the document,if the next character after the space is "-",(example:sudo apt-get –y install),please enter into Linux host to execute manually.(Copying ,pasting to the host directly to execute may fail ).
4)Linux commands that have not been written in all lines in the document should be manually entered into the Linux host (because the copy and paste commands cannot contain special characters such as "line breaks").
5)Note whether the execution result is consistent with the document image when you enter and execute the command. check the command was entered incorrectly or failed to execute.
6)Please follow the document strictly to compile for the first time.Otherwise ,there may be unexpected error.
Screenshots instruction
To make the view look neat and tidy , the command prompt in the screenshot should use myzr$ uniformly.
Linux command in the image
In the image of the document, you can see the input Linux command visually from the lines that start with “myzr$”.
Important information instruction
To avoid our customers wasting time and energy when they encounter unnecessary problems in building development environment and compiling process,it is recommended to use “vb43-u12045-serv-amd64” virtual machine system released by MYZR.
Details refered to 《virtual machine system instruction》
Source code
The corresponding Linux version of the evaluation board and the corresponding source code files are shown in the table below:
| Evaluation board model | u-boot Source code | linux Source code |
|---|---|---|
| MY-IMX6-EK200 | u-boot-2015.04.tar.xz | linux-3.14.52.tar.xz |
| MY-IMX6-EK314 | ||
| MY-IMX6-EK336 | ||
| MY-IMX6-EK140 |
Cross compiler tool file
- Linux program cross compiler tool:gcc-linaro-arm-linux-gnueabihf-4.9-2014.09_linux.tar.xz
- Linux cross compiler tool configuration file:gcc-linaro-arm-linux-gnueabihf-492-env
- QT5 program compiler tool:fsl-imx-x11-glibc-x86_64-meta-toolchain-qt5-cortexa9hf-vfp-neon-toolchain-3.14.52-1.1.0.sh
Creat working directory
1)Source code directory
$ mkdir ~/my-imx6/02_source –p
![]()
2)Tool directory
$ mkdir ~/my-imx6/03_tools –p
![]()
3)Image directory
$ mkdir ~/my-imx6/04_image –p
![]()
$ mkdir ~/my-imx6/04_image/image-linux-31452 –p
![]()
4)Application directory
$ mkdir ~/my-demo
![]()
Install cross-compilation tool chain
Install Linux cross-compilation tool chain
1)Enter cross compiler tool chain directory
$ cd ~/my-imx6/03_tools/
2)Copy Linux cross compiler tool to directory
Copy "gcc-linaro-arm-linux-gnueabihf-4.9-2014.09_linux.tar.xz "to"~/my-imx6/03_tools",complete this step by yourself in a proper way.
3)Uncompress Linux Cross Compilation Tools
$ tar xf gcc-linaro-arm-linux-gnueabihf-4.9-2014.09_linux.tar.xz
![]()
4)Copy cross compiler tool configuration file.
Copy "gcc-linaro-arm-linux-gnueabihf-492-env "to"~/my-imx6/03_tools",complete this step by yourself in a proper way.
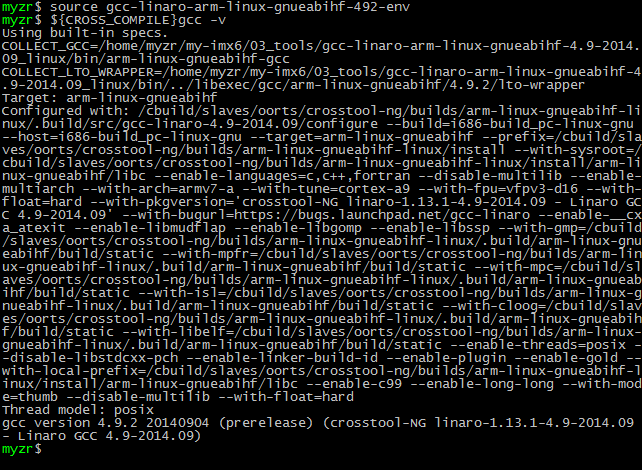
5)Check installation
$ source gcc-linaro-arm-linux-gnueabihf-492-env
$ ${CROSS_COMPILE}gcc –v

Install QT5 cross compiler tool
1)Enter cross compiler tool chain directory
$ cd ~/my-imx6/03_tools/
![]()
2)Execute installation command
$ sh fsl-imx-x11-glibc-x86_64-meta-toolchain-qt5-cortexa9hf-vfp-neon-toolchain-3.14.52-1.1.0.sh
3)Choose installation path
- After execution of installation command,there will be a following prompt message:
- Enter target directory for SDK (default: /opt/fsl-imx-x11/3.14.52-1.1.0):
- Then press“Enter”key,let's keep defauted installation path.
4)Confirm installation path
- Afterwards,there will be a following prompt message:
- You are about to install the SDK to "/opt/fsl-imx-x11/3.14.52-1.1.0". Proceed[Y/n]?
- Then enter“Y”and press“Enter”key for confirmation.
5)Wait for the installation to complete
Tips:installation will take a few minutes。
6) Check installation
Check the version information of cross compiler tool chain to verify the normality of installation
$ source /opt/fsl-imx-x11/3.14.52-1.1.0/environment-setup-cortexa9hf-vfp-neon-poky-linux-gnueabi
$ qmake -v
After execution of command,there will be following message:

U-Boot compilation
Prepare compilation
Copy the source package to the development host
Copy“u-boot source code”downloaded to “~/my-imx6/02_source”of Linux development host.
Complete this step by yourself in a proper way.
Decompress u-boot source code package
$ cd ~/my-imx6/02_source/
$ tar xf u-boot-2015.04.tar.xz
![]()
Compilation
Validate compiler configuration file
$ source ~/my-imx6/03_tools/gcc-linaro-arm-linux-gnueabihf-492-env
![]()
Enter u-boot source code directory
$ cd ~/my-imx6/02_source/u-boot-2015.04
![]()
Remove u-boot temporary files
Configure u-boot
Configuration of development and its corresponding compiler:
| Development board main model | CPU type-memory capacity | Architeture of processor | Corresponding u-boot configuration |
|---|---|---|---|
| MY-IMX6-EK200 | i.MX 6QuadPlus - 1G | Cortex-A9 | myimx6ek200-6qp_config |
| i.MX 6QuadPlus - 2G | Cortex-A9 | myimx6ek200-6qp-2g_config | |
| i.MX6 Quad - 1G | Cortex-A9 | myimx6ek200-6q_config | |
| i.MX6 Quad - 2G | Cortex-A9 | myimx6ek200-6q-2g_config | |
| i.MX6 DualLite - 1G | Cortex-A9 | myimx6ek200-6u_config | |
| i.MX 6Solo - 512M | Cortex-A9 | myimx6ek200-6s_config | |
| i.MX 6Solo - 1G | Cortex-A9 | myimx6ek200-6s-1g_config | |
| MY-IMX6-EK314 | i.MX 6QuadPlus - 1G | Cortex-A9 | myimx6ek200-6qp_config |
| i.MX 6QuadPlus - 2G | Cortex-A9 | myimx6ek200-6qp-2g_config | |
| i.MX6 Quad- 1G | Cortex-A9 | myimx6ek314-6q_config | |
| i.MX6 Quad- 2G | Cortex-A9 | myimx6ek314-6q-2g_config | |
| i.MX6 DualLite - 1G | Cortex-A9 | myimx6ek314-6u_config | |
| MY-IMX6-EK336 | i.MX 6QuadPlus - 1G | Cortex-A9 | myimx6ek336-6qp_config |
| i.MX 6QuadPlus - 2G | Cortex-A9 | myimx6ek336-6qp-2g_config | |
| i.MX6 Quad- 1G | Cortex-A9 | myimx6ek336-6q_config | |
| i.MX6 Quad- 2G | Cortex-A9 | myimx6ek336-6q-2g_config | |
| MY-IMX6-EK140 | i.MX 6UltraLite-256M | Cortex-A7 | myimx6ek140-6g_config |
| i.MX 6UltraLite-512M | Cortex-A7 | myimx6ek140-6g-512m_config | |
| i.MX 6UltraLite Full - 256M | Cortex-A7 | myimx6ek140p-6g_defconfig | |
| i.MX 6UltraLite Full - 512M | Cortex-A7 | myimx6ek140p-6g-512m_defconfig |
- MYIMX6EK200-6Q-1G configuration example:
Execute compilation
$ make
Tips:To speed up the compilation,add "-j4" after make.The Linux host used to compile is dual-core ,4 threads .So "-j" is followed by 4, which takes 4 threads to compile. The number behind "-j" is allocated based on system resources,but It should not exceed the maximum threads the host support.

Complete compilation
Tips: u-boot compiling process may take one or two minutes.

Target file
- Compile file
After compilation you can see the files compiled obtained by the ls command: u-boot.imx.
$ ls

- Target file
The corresponding target file name for u-boot configuration of MY-IMX6 series evaluation board is shown in the table below:
| u-boot Configuration | Target file |
|---|---|
| myimx6ek200-6qp_config | uboot-myimx6ek200-6qp.imx |
| myimx6ek200-6qp-2g_config | uboot-myimx6ek200-6qp-2g.imx |
| myimx6ek200-6q_config | uboot-myimx6ek200-6q.imx |
| myimx6ek200-6q-2g_config | uboot-myimx6ek200-6q-2g.imx |
| myimx6ek200-6u_config | uboot-myimx6ek200-6u.imx |
| myimx6ek200-6s_config | uboot-myimx6ek200-6s.imx |
| myimx6ek200-6s-1g_config | uboot-myimx6ek200-6s-1g.imx |
| myimx6ek314-6qp_config | uboot-myimx6ek314-6qp.imx |
| myimx6ek314-6qp-2g_config | uboot-myimx6ek314-6qp-2g.imx |
| myimx6ek314-6q_config | uboot-myimx6ek314-6q.imx |
| myimx6ek314-6q-2g_config | uboot-myimx6ek314-6q-2g.imx |
| myimx6ek314-6u_config | uboot-myimx6ek314-6u.imx |
| myimx6ek336-6qp_config | uboot-myimx6ek336-6qp.imx |
| myimx6ek336-6qp-2g_config | uboot-myimx6ek336-6qp-2g.imx |
| myimx6ek336-6q_config | uboot-myimx6ek336-6q.imx |
| myimx6ek336-6q-2g_config | uboot-myimx6ek336-6q-2g.imx |
| myimx6ek140-6g_config | uboot-myimx6ek140-6g.imx |
| myimx6ek140-6g-512m_config | uboot-myimx6ek140-6g-512m.imx |
| myimx6ek140p-6g_defconfig | uboot-myimx6ek140p-6g.imx |
| myimx6ek140p-6g-512m_defconfig | uboot-myimx6ek140p-6g-512m.imx |
We need to copy the compilied file u-boot.imx as our target file name.:
Copy the generated file u-boot.imx from the compilation of myimx6ek200-6q_config as target file.):
$ cp u-boot.imx ~/my-imx6/04_image/image-linux-31452/uboot-myimx6ek200-6q.imx
![]()
Compile kernel
Prepare compilation
Copy source code package to development host
Copy “linux source code”downloaded to “~/my-imx6/02_source”of Linux development host.
Complete this step by yourself in a proper way.
Decompress linux source code package
$ cd ~/my-imx6/02_source/
$ tar xf linux-3.14.52.tar.xz
![]()
Kernel compilation configuration
Validate compiler configuration file
$ source ~/my-imx6/03_tools/gcc-linaro-arm-linux-gnueabihf-492-env
![]()
Remove kernel temporary file
- Enter linux source code directory
$ cd ~/my-imx6/02_source/linux-3.14.52
![]()
- Remove temporary file
Kernel configuration
- Kernel configuration file
| Evaluation board model | Configuration file |
|---|---|
| MY-IMX6-EK200 | myimx6_defconfig |
| MY-IMX6-EK314 | |
| MY-IMX6-EK336 | |
| MY-IMX6-EK140 | myimx6ul_defconfig |
$ make myimx6_defconfig
If you are compiling the kernel of MY-IMX6-EK140,please use $ make myimx6ul_defconfig
Take myimx6_defconfig as an example.

Compile kernel
- Execute compilation
- Complete compilation
- Target file
arch/arm/boot/zImage is a compiled kernel file that can be viewed using the ls command.
$ ls arch/arm/boot/zImage -la
![]()
Note: The kernel file name which is going to be programed and started is “zImage-myimx6”, So we should Copy zImage as zImage-myimx6
$ cp arch/arm/boot/zImage ~/my-imx6/04_image/image-linux-31452/zImage-myimx6
![]()
Compile device tree
The correspondence between the type of evaluation board and device tree is shown below:
| Development main mode | CPU type-memory capacity | Corresponding device tree file |
|---|---|---|
| MY-IMX6-EK200 | i.MX 6QuadPlus - 1G | myimx6ek200-6qp.dtb |
| i.MX 6QuadPlus - 2G | myimx6ek200-6qp-2g.dtb | |
| i.MX6 Quad - 1G | myimx6ek200-6q.dtb | |
| i.MX6 Quad - 2G | myimx6ek200-6q-2g.dtb | |
| i.MX6 DualLite - 1G | myimx6ek200-6u.dtb | |
| i.MX 6Solo - 512M | myimx6ek200-6s.dtb | |
| i.MX 6Solo - 1G | myimx6ek200-6s-1g.dtb | |
| MY-IMX6-EK314 | i.MX 6QuadPlus - 1G | myimx6ek314-6qp.dtb |
| i.MX 6QuadPlus - 2G | myimx6ek314-6qp-2g.dtb | |
| i.MX6 Quad - 1G | myimx6ek314-6q.dtb | |
| i.MX6 Quad - 2G | myimx6ek314-6q-2g.dtb | |
| i.MX6 DualLite - 1G | myimx6ek314-6u.dtb | |
| MY-IMX6-EK336 | i.MX 6QuadPlus - 1G | myimx6ek336-6qp.dtb |
| i.MX 6QuadPlus - 2G | myimx6ek336-6qp-2g.dtb | |
| i.MX6 Quad - 1G | myimx6ek336-6q.dtb | |
| i.MX6 Quad - 2G | myimx6ek336-6q-2g.dtb | |
| MY-IMX6-EK140 | i.MX 6UltraLite-256M | myimx6ek140-6g.dtb |
| i.MX 6UltraLite-512M | myimx6ek140-6g-512m.dtb | |
| i.MX 6UltraLite Full - 256M (2eth) | myimx6ek140p-6g.dtb | |
| i.MX 6UltraLite Full - 256M (8uart) | myimx6ek140p-6g-8uart.dtb | |
| i.MX 6UltraLite Full - 512M (2eth) | myimx6ek140p-6g-512m.dtb | |
| i.MX 6UltraLite Full - 512M (8uart) | myimx6ek140p-6g-512m-8uart.dtb |
- Take MY-IMX6-EK200-6Q-1G as example:
- Target file
You can browse the target device tree file information from compilation with ls command:
$ ls arch/arm/boot/dts/myimx6ek*.dtb
![]()
Copy device tree file to image directory
$ cp arch/arm/boot/dts/myimx6ek*.dtb ~/my-imx6/04_image/image-linux-31452/
![]()
Compile module
- Compile module command
- Install module to the specified directory
$ make modules_install INSTALL_MOD_PATH=./modules

- Package the module file
$ cd modules
$ tar cjf ../modules.tar.bz2
![]()
- Copy module package to image directory
| Development board model) | Target module package |
|---|---|
| MY-IMX6-EK200 | kernel-modules-myimx6.tar.bz2 |
| MY-IMX6-EK314 | |
| MY-IMX6-EK336 | |
| MY-IMX6-EK140 | kernel-modules-myimx6g.tar.bz2 |
$ cp ../modules.tar.bz2 ~/my-imx6/04_image/image-linux-31452/kernel-modules-myimx6.tar.bz2
Note:when you compile the Kernel If the configuration file you use is myimx6_defconfig, here you should Copy modules.tar.bz2 as kernel-modules-myimx6.tar.bz2.If the configuration file is
myimx6ul_defconfig,you should Copy modules.tar.bz2 as kernel-modules-myimx6g.tar.bz2.
Application compilation
Linux application compilation
Wite an application
- Create application source code directory and Linux-3.14.52 executable program directory
$ mkdir ~/my-demo/source_code -p
![]()
$ mkdir ~/my-demo/bin-l31452 -p
![]()
- Write source code
$ cd ~/my-demo/source_code
$ vi hello.c
Write following code and save
#include <stdio.h>
int main(int argc, char **argv)
{
printf("Hello, MYZR!\n");
return;
}
- View code</span>
$ cat hello.c
Compile application
- Configure environment variables
$ source ~/my-imx6/03_tools/gcc-linaro-arm-linux-gnueabihf-492-env
![]()
- Compile
$ ${CROSS_COMPILE}gcc hello.c -o hello.out
![]()
Note:The above command contains “$”,which is “${CROSS_COMPILE}gcc”. It is the environment variable generated when referring to our source.
- Target file
$ file hello.out

You can see the property of target file hello.out.
Save target executable file
$ mv hello.out ~/my-demo/bin-l31452/
![]()
QT application Compile
Prepare QT5 program code
Tips:Here We demonstrate with “Qt5_NMap_CarouselDemo_1.0.tgz".
1)Copy code package to Linux development host
Copy code package“Qt5_NMap_CarouselDemo_1.0.tgz”to“~/my-demo/source_code”.
Complete this step by yourself in a proper way
2)Decompress code package
$ cd ~/my-demo/source_code
$ tar zxf Qt5_NMap_CarouselDemo_1.0.tgz
![]()
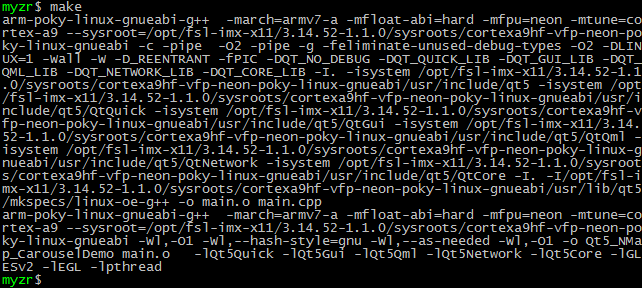
Compile QT5 application
Tips: We compile with commands。</span>
1)Enter code directory
Tips:first we decompress code package“Qt5_NMap_CarouselDemo_1.0.tgz”to“~/my-demo/source_code”
$ cd ~/my-demo/source_code/Qt5_NMap_CarouselDemo_1.0/
2)Check QMake
$ qmake –v

If the current terminal output has “QMake version 3.0” after the execution of command,that means cross compiler is Configured normally.
Otherwise you need to execute the command below:
$ source /opt/fsl-imx-x11/3.14.52-1.1.0/environment-setup-cortexa9hf-vfp-neon-poky-linux-gnueabi
3)Creat Makefile
$ qmake
![]()
You can see an extra Makefile with ls after execution of qmake.
5)Target file
- Executable file
- Source file
Running QT5 needs the corresponding qml file and content

Save target executable file
Because running QT5 program requires qml file and content file, here We copy the entire directory to the target directory for simplicity.
$ cp ../Qt5_NMap_CarouselDemo_1.0 ~/my-demo/bin-l31452/ -a
![]()
Package application
Instruction
Programming tool supports to program “my-demo.tar.xz” file package to evaluation board.So We package applications We need as “my-demo.tar.xz”.while where “my-demo.tar.xz” will be programmed ,refer to 《burning manual》.
Package application
1)Package
Here We package the whole my-demo directory.
$ cd ~
$ tar cjf my-demo.tar.bz2 my-demo
![]()
2)Copy application package as target programming file
$ cp my-demo.tar.bz2 ~/my-imx6/04_image/image-linux-31452/
![]()
Target programming file
So far,we get a set of programming file except file system from“~/my-imx6/04_image/image-linux-31452/”。including“uboot*.imx”、“myimx6*.dtb”、“zImage-myimx6”、“kernel-modules.tar.bz2”、“my-demo.tar.bz2”.
Now we can program the image we compiled by ourselves referring to 《programming manual》.
Run application on the evaluation board
After the burning, supply power for evaluation board,login system and execute commands below.
- /home/root/my-demo/bin-l31452/hello.out
- export DISPLAY=:0
- /home/root/my-demo/bin-l31452/Qt5_NMap_CarouselDemo_1.0/Qt5_NMap_CarouselDemo-platform eglfs
Appendix:file system compilation
Notes and instructions:
1)The download of the original compilation exceed 4G。(Tips:you can use files we have downloaded in order to reduce downloads and save time,which is going to be mentioned in 7.4).
2)The network of the compilation host is good to access to www.fackbook.com .Otherwise It may be subject to the condition of the domestic firewall and It is unable to download the software for compilation.
3)The initial compilation may take 2 hours to unlimited time.It depends on the network state and the configuration of the host.(After a rough statistics, It took about 100 minutes to compile QT5 system on the 16-core CPU 16 G memory host except download time).
Customer may decide whether to compile the file system or use the file system We provide based on the actual situation. If the file system we provide meets the requirements, you had better not to compile by yourself. Since It may be a lot of errors during compilation.
Prepare for compilation
Install software package
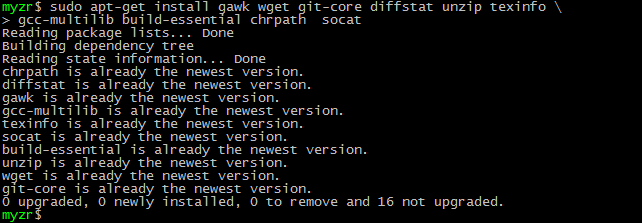
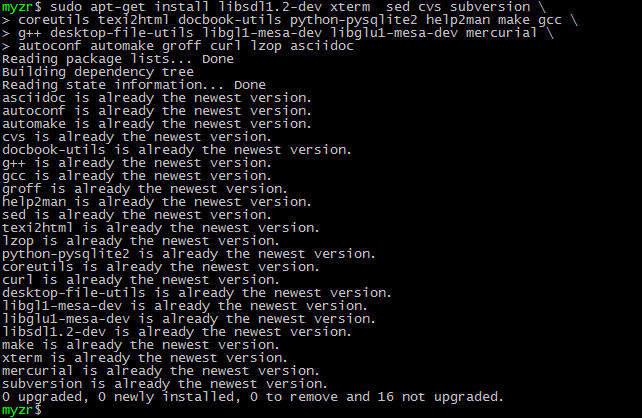
Instruction,Yocto compilation relies on some software package. So you need to Install them on the host.
$ sudo apt-get install gawk wget git-core diffstat unzip texinfo \
gcc-multilib build-essential chrpath socat

$ sudo apt-get install libsdl1.2-dev xterm sed cvs subversion \
coreutils texi2html docbook-utils python-pysqlite2 help2man make gcc \
g++ desktop-file-utils libgl1-mesa-dev libglu1-mesa-dev mercurial \
autoconf automake groff curl lzop asciidoc

$ sudo apt-get install uboot-mkimage

Prepare source code
1)Download source code
From network disk download yocto__imx-3.14.52-1.1.0_ga.tar.xz
2)Create working directory
$ mkdir ~/yocto
![]()
3)Copy source code package to working directory
Copy“yocto__imx-3.14.52-1.1.0_ga.tar.xz”to“~/my-imx6/02_source”.
Complete this step by yourself in a proper way
4) Decompress source code package
$ cd ~/yocto/
$ tar xf yocto__imx-3.14.52-1.1.0_ga.tar.xz
![]()
Prepare software package required for compilation
Tips1:If you have a good network and can access a foreign website ,you can skip this section.
Tips2:If you use the package we have downloaded, please go on to the next step.
Tips3:Limited to the impact of network upload speed and software package updates, we may not include the downloaded package directory.
Compile all the necessary packages, but the missing package compilers will be downloaded during the compilation process.
1)Download software package
Download the downloads folder on the disk drive (Location: MYZR-Universal Resources / yocto / downloads. Currently the folder size is 6 ~ 8G).
2)Copy software package to BSP directory
- Move downloads to “~/yocto/imx-3.14.52-1.1.0_ga” directory
- Complete this step by yourself in a proper way.
Compilation
Update BSP
$ cd ~/yocto/imx-3.14.52-1.1.0_ga/
![]()
Compilation configuration
$ DISTRO=fsl-imx-x11 MACHINE=imx6qsabresd source fsl-setup-release.sh -b build-x11

After executing the command,the terminal will receive the output message, keep pressing "space" ,enter "y" in the final dialog

Example:Do you accept the EULA you just read? (y/n) y
Compiling the QT5 file system
1)Execute compilation command
$ bitbake fsl-image-qt5

Tips: It takes about one hour to compile on the 16-core CPU and 16G memory host to complete the compilation process except download time.
2)Target file
$ ls ./tmp/deploy/images/imx6qsabresd/fsl-image-qt5-imx6qsabresd.tar.bz2
![]()
3)Copy target file
The QT5 file system name we programmed is “distro-fsl-image-qt5.tar.bz2”, So we need to copy the compiled file as “distro-fsl-image-qt5.tar.bz2”.
$ cp ./tmp/deploy/images/imx6qsabresd/fsl-image-qt5-imx6qsabresd.tar.bz2 ~/my-imx6/04_image/image-linux-31452/distro-fsl-image-qt5.tar.bz2
![]()
Compile Linux file system
1)Execute compile command
$ bitbake fsl-image-machine-test
2)Target file
$ ls ./tmp/deploy/images/imx6qsabresd/fsl-image-machine-test-imx6qsabresd.tar.bz2

3)Copy target file
The QT5 file system name We programmed is “distro-fsl-image.tar.bz2”, So we need to copy the compiled file as “distro-fsl-image.tar.bz2”.
$ cp ./tmp/deploy/images/imx6qsabresd/fsl-image-machine-test-imx6qsabresd.tar.bz2 ~/my-imx6/04_image/image-linux-31452/distro-fsl-image.tar.bz2
![]()
Compile the cross-compiler tool for QT5
If you do not need to customize QT5 cross-compiler tool ,skip this section.
1)Execute compilation command
$ bitbake meta-toolchain-qt5
2)Target file
In the "./tmp/deploy/sdk/" directory, we can find the target file we compile and generate.

3)Save target file
Copy“fsl-imx-x11-glibc-x86_64-meta-toolchain-qt5-cortexa9hf-vfp-neon-toolchain-3.14.52-1.1.0.sh”we compiled to“~/my-imx6/03_tools/”
4)Install QT5 cross-compiler tool
If you need to use QT5 cross-compiler tool compiled by yourself, you have to remove QT5 cross-compiler tool which has been already Installed.
Install it referring to the "Install QT5 cross-compile tool" of "Install and Configure cross-compile tool chain.


