MYZR-LS1012A-EK200 Install and configure the flashing tool
来自明远智睿的wiki
目录
Install and configure the flashing tool
Install the burning tool
Open the tool directory, double-click ** CW_ARMv8_v2019.01_b190130_Win_Offline.exe ** to install, the installation path and configuration default selection.
Copy the rcw and uboot images to the burning tool directory
Copy rcw_800.bin.swapped and ls1012a-ek200-uboot.bin to the directory :C:\Freescale\CW4NET_v2019.01\CW_ARMv8\ARMv8\gdb\bin。
Configure the burning tool script file
- Open file:C:\Freescale\CW4NET_v2019.01\CW_ARMv8\ARMv8\gdb_extensions\flash\cwflash.py
2.Modify the contents of the file: 。。。
PROBE_CONNECTION = "cmsisdap"
。。。
FLASH_TYPE = "qspi"
。。。
SOC_NAME = "LS1012A"
。。。
JTAG_SPEED = 6000
。。。
Development board burns RCW and Uboot images
Put the development board in download mode
Find the two-digit DIP switch indicated by ** BOOTMODE ** or ** BOOT SWITCH ** on the development board, 1 to ON, 2 to OFF.
Connect development board and computer
- Turn on the power, plug in the K20-JTAG module to the development board, and connect the other end to the computer via a MINI USB cable.
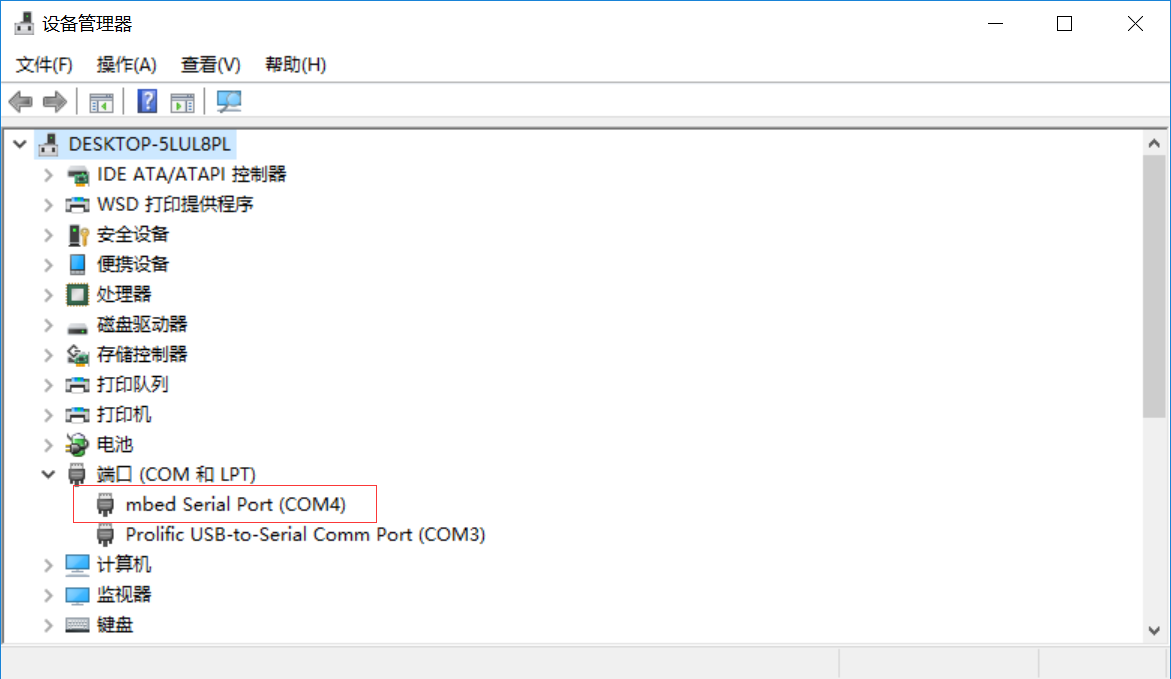
- Double-click ** mbedWinSerial_16466.exe ** in the tool directory to install the driver.
- After installation, open the device manager of the computer to see the corresponding ports as shown below.

Burn RCW and Uboot images to the development board
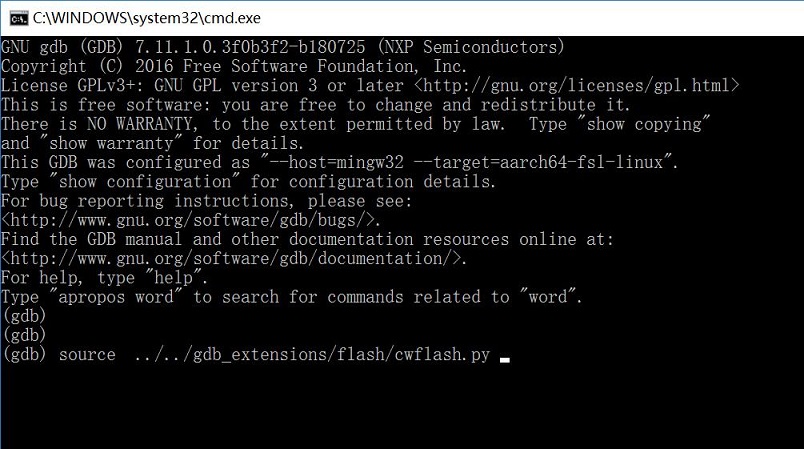
- Double-click:“C:\Freescale\CW4NET_v2019.01\CW_ARMv8\ARMv8\gdb\bin\aarch64-fsl-gdb.bat”。
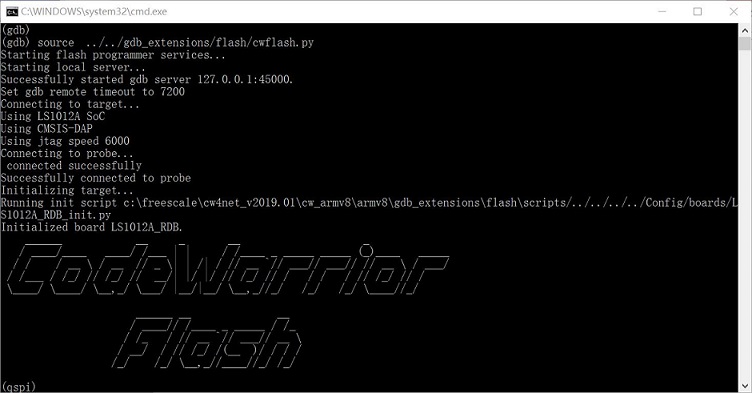
2. Pop up command window, enter command:source ../../gdb_extensions/flash/cwflash.py
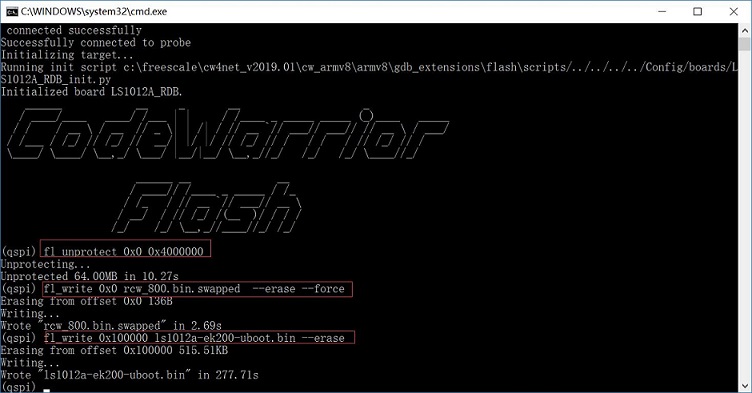
3. Enter the following commands in order:
fl_unprotect 0x0 0x4000000
fl_write 0x0 rcw_800.bin.swapped --erase --force
fl_write 0x100000 ls1012a-ek200-uboot.bin --erase
quit
4.After programming, turn off the power to the development board, unplug the USB cable, and set the dialing mode to startup mode. 1 to OFF, 2 to ON.


Development board burning ppa, uImage, dtb and file system
tftpd software download and use
- Download tftpd64 software online.
- Open the software and hit Browse to select the directory where the image file is located
Burn ppa, uImage and dtb image
- Connect the computer with an Internet cable to connect to the network port of the development board.
- Restart the development board and enter uboot command line.
- Enter the command:
=====> Input:
setenv ipaddr 192.168.137.9
setenv serverip 192.168.137.99
setenv ethaddr 00:00:00:00:00:03
ping 192.168.137.99

=====> Output:
=> setenv ipaddr 192.168.137.9
=> setenv serverip 192.168.137.99
=> setenv ethaddr 00:00:00:00:00:03
=> ping 192.168.137.99
Speed detected 3e8
Using pfe_eth0 device
host 192.168.137.99 is alive
4. After ping, enter the command:
=====> Input:
run update_ppa

=====> Output:
Speed detected 3e8
Using pfe_eth0 device
TFTP from server 192.168.137.99; our IP address is 192.168.137.9
Filename 'ppa.itb'.
Load address: 0x96000000
Loading: #######
     5.3 MiB/s
done
Bytes transferred = 89027 (15bc3 hex)
SF: Detected S25FS512S with page size 256 Bytes, erase size 256 KiB, total 64 MiB
SF: 262144 bytes @ 0x500000 Erased: OK
device 0 offset 0x500000, size 0x15bc3
SF: 89027 bytes @ 0x500000 Written: OK
=====> Input:
run update_image

=====> Output:
Speed detected 3e8
Using pfe_eth0 device
TFTP from server 192.168.137.99; our IP address is 192.168.137.9
Filename 'uImage-ek200'.
Load address: 0x96000000
Loading: #################################################################
     #################################################################
     #################################################################
     #################################################################
     #################################################################
     #################################################################
     #################################################################
     #################################################################
     #################################################################
     #################################################################
     #################################################################
     #################################################################
     #################################################################
     #################################################################
     #############################################
     6.2 MiB/s
done
Bytes transferred = 14015040 (d5da40 hex)
SF: Detected S25FS512S with page size 256 Bytes, erase size 256 KiB, total 64 MiB
=====> Input:
run update_dtb

=====> Output:
Speed detected 3e8
Using pfe_eth0 device
TFTP from server 192.168.137.99; our IP address is 192.168.137.9
Filename 'ls1012a-ek200.dtb'.
Load address: 0x96000000
Loading: #
     2.7 MiB/s
done
Bytes transferred = 11242 (2bea hex)
SF: Detected S25FS512S with page size 256 Bytes, erase size 256 KiB, total 64 MiB
SF: 262144 bytes @ 0x2700000 Erased: OK
device 0 offset 0x2700000, size 0x2bea
SF: 11242 bytes @ 0x2700000 Written: OK
Update file systems and modules
- Load ramdisk and start the system
=====> Input:
run load_itb

=====> Output:
Speed detected 3e8
Using pfe_eth0 device
TFTP from server 192.168.137.99; our IP address is 192.168.137.9
Filename 'ls1012a-ek200.itb'.
Load address: 0x96000000
Loading: #################################################################
2. After starting the development board, enter the command:
=====> Input:
root
umount /dev/mmcblk0
mkfs.ext3 /dev/mmcblk0


=====> Output:
mke2fs 1.42.9 (28-Dec-2013)
Filesystem label=
OS type: Linux
Block size=4096 (log=2)
Fragment size=4096 (log=2)
Stride=0 blocks, Stripe width=0 blocks
239040 inodes, 954368 blocks
47718 blocks (5.00%) reserved for the super user
First data block=0
Maximum filesystem blocks=977272832
30 block groups
32768 blocks per group, 32768 fragments per group
7968 inodes per group
Superblock backups stored on blocks:
    32768, 98304, 163840, 229376, 294912, 819200, 884736

Allocating group tables: done
Writing inode tables: done
Creating journal (16384 blocks): done
Writing superblocks and filesystem accounting information: done
3.Mount
=====> Input:
mount /dev/mmcblk0 /mnt/
cd /mnt/
4.tftp Transfer files
=====> Input:
ifconfig eth0 192.168.137.9
tftp -gr rootfs.tar.gz 192.168.137.99

=====> Output:
rootfs.tar.gz        100% |****************************************************************| 41271k  0:00:00 ETA
=====> Input:
tftp -gr modules.tar 192.168.137.99

=====> Output:
modules.tar          100% |****************************************************************| 15240k  0:00:00 ETA
5. Extracting file systems and modules
=====> Input:
tar zxf rootfs.tar.gz -C /mnt/
tar xf modules.tar -C /mnt/
rm rootfs.tar.gz modules.tar
4. After the extraction is complete, enter the command to restart the development board:
=====> Input:
reboot